Chocolate!

Well we are at it again!
After the various successes in making croissants, we crazy blogging baking ladies are at it again! We can't seem to figure on a name, but we all agree that those who bake together, bake!

And who is baking? There are ten of us now:

Ivonne: Cream Puffs in Venice
Lisa: La Mia Cucina
Peabody: Culinary Concoctions by Peabody
Helene: Tartelette
Brilynn: Jumbo Empanadas
Veronica: Veronica's Test Kitchen
Tanna: My Kitchen In Half Cups
Hester: Hester in Geneva
Mary: Alpineberry

Oh, and me.

However, after the challenge of last months croissants, it was agreed upon that something much simpler (but not less tasty) be chosen for this months assignment. After a few joke suggestions (peanut butter sandwiches, microwave popcorn!) we finally agreed upon a flour-less chocolate cake, the recipe Chocolate Intensity from Tish Boyle's The Cake Book (which hopefully will be arriving at my door any time now! Oooh I can't wait!) (Note - when I said any time now, I didn't mean literally, however while writing this, my books were delivered!)
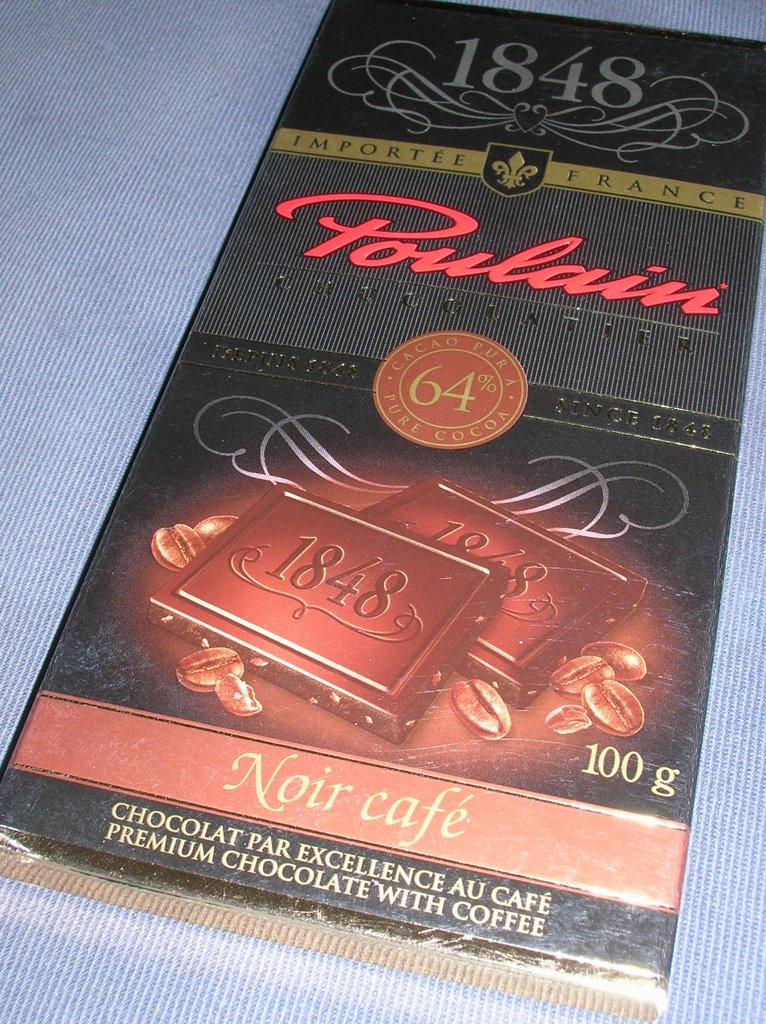
The recipe for this cake uses only a few quality ingredients - lots of bittersweet chocolate,butter, sugar, eggs, vanilla, salt and coffee, a traditional flavor partner with chocolate. One I am not fond of at all. Rather ironic that one of the standard flavors that enhances chocolate, one of my favorite flavors, is one that I don't like at all. (I guess that is another one of those odd food facts about me.)

Here's another little oddity - when searching recently for chocolate, I ended up inadvertently buying two bars of 64% chocolate with coffee. The recipe called for 62% chocolate, which I never found anywhere, so used this coffee chocolate, along with an additional ounce of a 70% bittersweet chocolate. Despite this additional flavor, and my dislike of coffee, I still added in the 1/2 cup of coffee. It was a weaker, instant coffee, but I still used it!

I'd never made a flour-less cake before (that I can remember.) I've read enough recipes to know that this recipe was a bit unique. It didn't involve whipping egg whites, or folding. Or tempering. And I can tell you, that lack of tempering the hot chocolate mixture into the whisked eggs made me nervous!
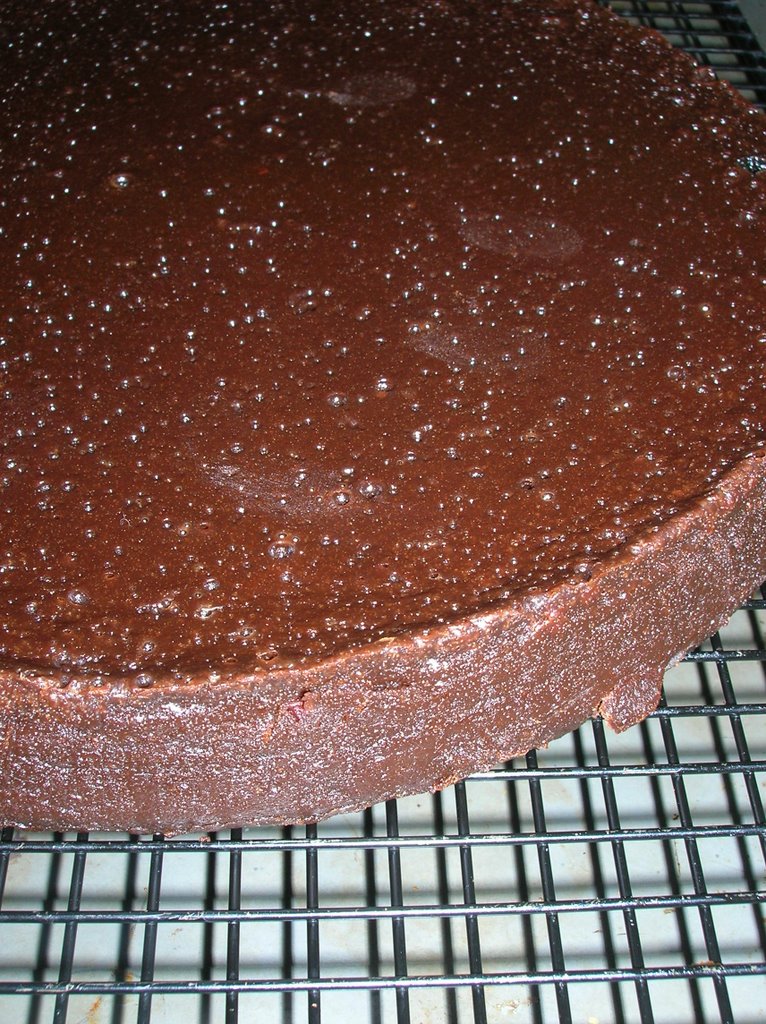
Some of the other ladies had already completed their cakes by this time, and no one had complained of pieces of cooked egg in their finished product, though, so I held faith in them (more so than the cookbook author) and whisked those eggs into the hot mixture (a combination of the chocolate, butter, sugar and coffee.) And you know what? It worked!

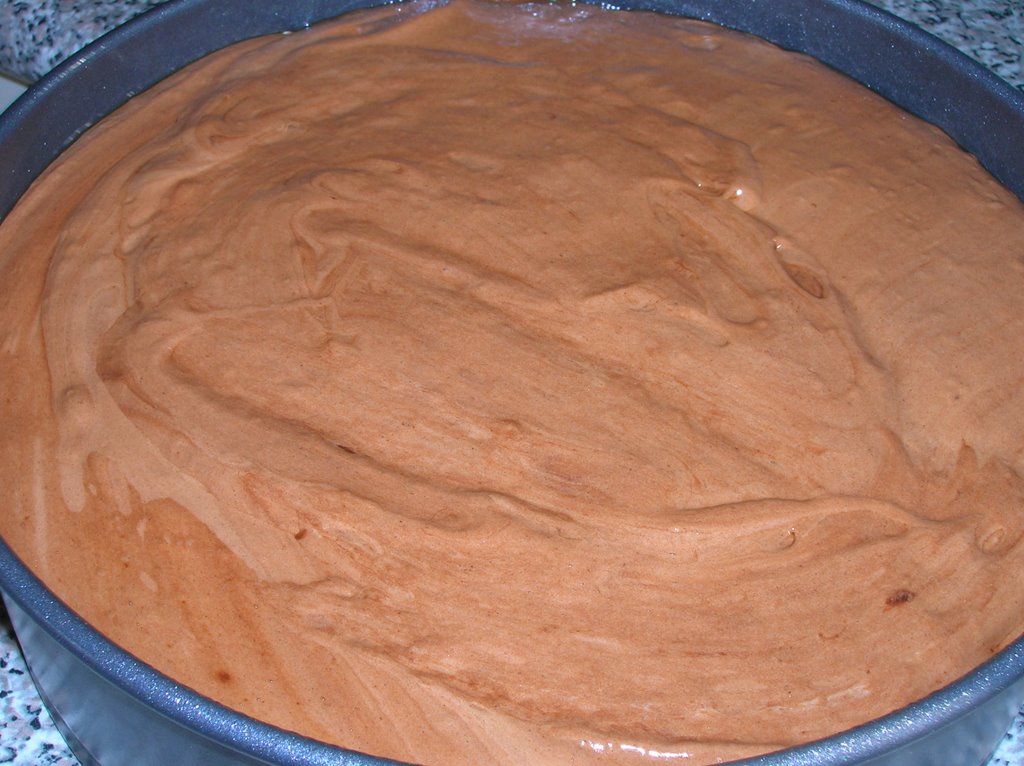
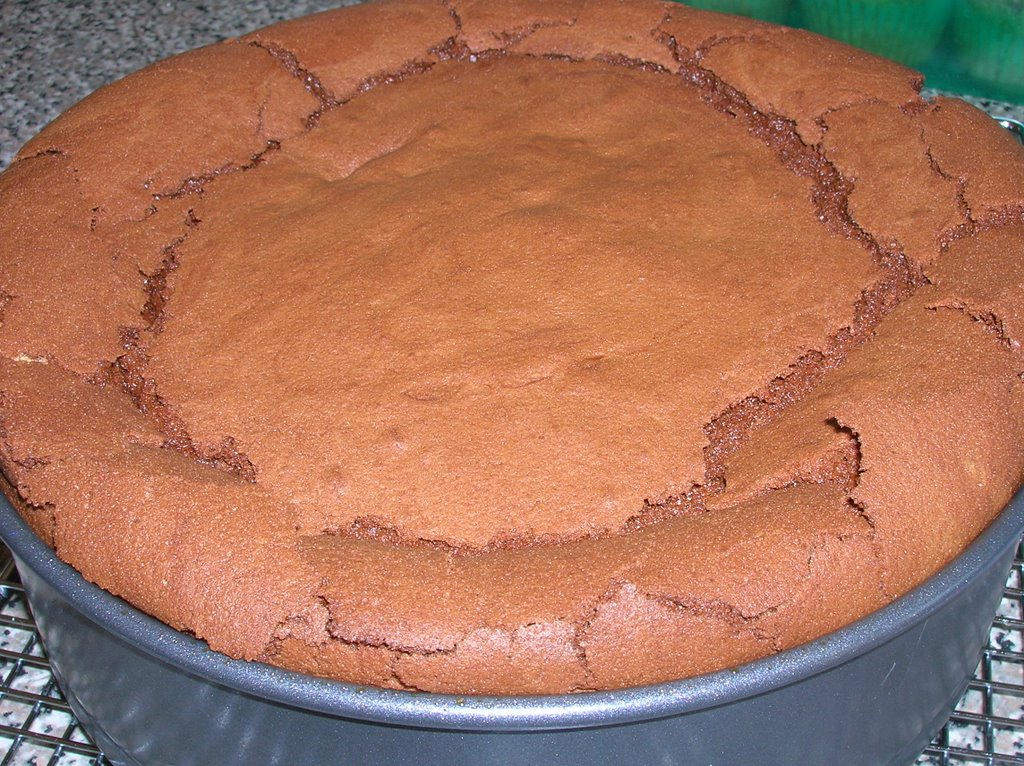
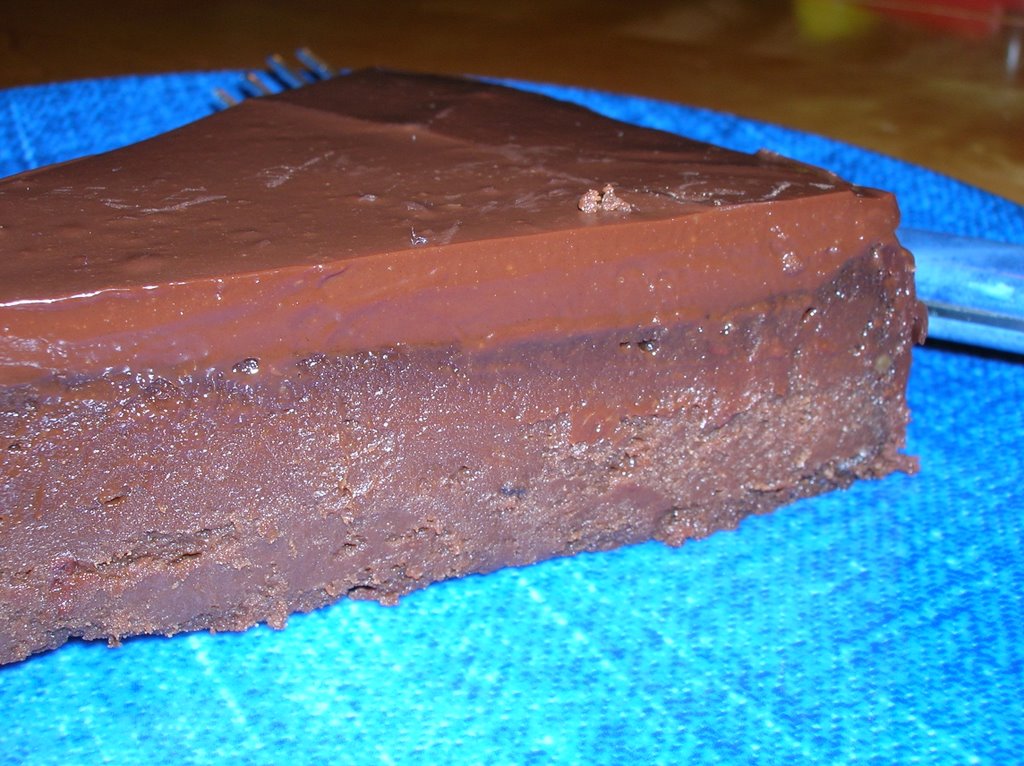
I don't own a 9 inch cake pan (yet) so used my springform pan, sealed tightly in foil before being placed in the waterbath. I still had a bit of leakage, but not much. My cake did not rise, as a cake involving whipped egg whites would, but instead seemed to be dense and fudge-like. It had small bubbles on the surface. Those bubbles were still there even after chilling.

To finish off this cake required a glaze. Not a sugar glaze, but a chocolate one of course! This is a chocolate intensity cake, so what else but more chocolate would do? So more chocolate was chopped and melted, this time with heavy cream and a touch of vanilla, before it was poured over the cold cake.
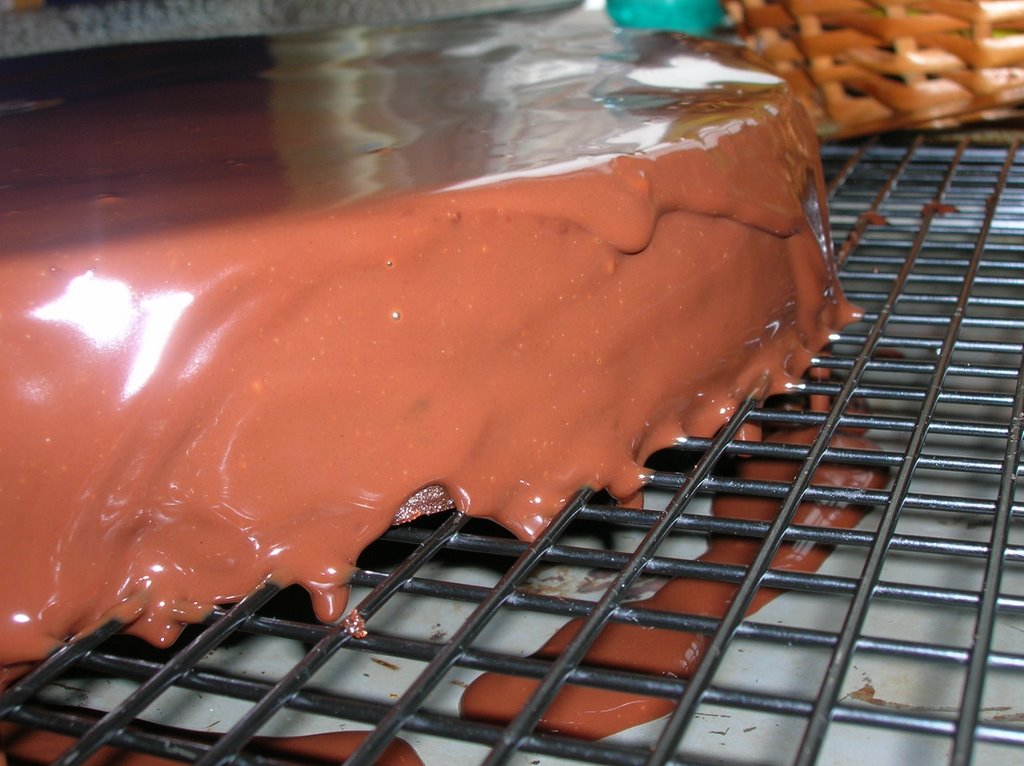
Smooth, smooth, smooth. Pour more chocolate. Smooth, smooth, smooth, pour more chocolate. Repeat until out of chocolate.

Now that's alot of chocolate!

Coffee not being a favorite in my house, I brought my cake out for "coffee night" with my girl friends, where coffee is enjoyed and savored. And chocolate is worshiped.

Tish describes this cake as similar to a creamy truffle, but fudgier. She's not wrong. This cake is both dense and light, which seems contradictory but isn't. The flavor is huge, the texture is dense, but the cake does not weigh you down or leave a feeling of "ugh" after from too much chocolate or sugar. One of my friends was shocked to learn she was eating a flour-less cake - she honestly could not fell from the texture and taste that there was no flour in the cake.

Despite the coffee flavor, which was very intense, I enjoyed this cake. I wish I'd brought home a small piece for myself to enjoy today (instead of sending it home with my chocolate-coffee loving friend as a belated birthday treat.) I would likely enjoy this alot more without such a strong coffee flavor, made with the coffee but not the coffee chocolate.

And after how well it was received last night, I can see that this cake will be requested again!

Now, I wonder what we are going to make next month? Baking with these ladies has been so much fun, and so inspiring, that I can't wait to read the rest of their entries and see what everyone thinks we should make next month.

Chocolate Intensity
from Tish Boyle's The Cake Book
(makes one 9-inch cake)

8 ounces bittersweet chocolate (preferably 62% cocoa), finely chopped
12 ounces (3 sticks) unsalted butter, cut into pieces
1 cup granulated sugar
1/2 cup brewed coffee
6 large eggs
1 tsp vanilla extract
1/8 tsp salt

Preheat oven to 350F. Butter the bottom and sides of a 9-inch round cake pan. Line the bottom with a parchment round and butter the parchment. (If you're using a pan with a removable bottom like a springform, make sure to wrap the pan with 2 or 3 layers of foil.)

Place chopped chocolate in a large bowl.

In a saucepan over medium-high heat, stir butter, sugar and coffee until the butter is melted and mixture is boiling. Pour the hot mixture over your chopped chocolate. Let stand for 1 minute then gently stir until chocolate is melted and the mixture is smooth.

In a medium bowl, whisk the eggs vigorously until blended. Whisk in the vanilla and salt. Slowly add about 3/4 cup hot chocolate mixture to the eggs, whisking constantly. (Tempering the eggs with a little bit of the hot chocolate mixture will prevent "scrambled eggs" when combining the two mixtures.) Add the egg mixture to the hot chocolate mixture and whisk to combine well.

Strain the batter through a sieve (to catch any cooked egg bits) and then pour batter into prepared pan. Set cake pan in a large roasting pan and fill the pan with enough hot water to come halfway up the sides of the cake pan. Bake for 35-45 minutes, until the center is shiny and set but still a bit jiggly. Transfer cake pan to a cooling rack and cool for 20 minutes.

Run a thin knife around the edge of the pan to loosen the cake. Place a cardboard round on top of the pan and invert the cake onto it. Remove pan and carefully remove the parchment paper. Refrigerate the cake for at least 2 hours before glazing with chocolate glaze.

Chocolate Glaze

6 ounces bittersweet chocolate, finely chopped
2/3 cup heavy whipping cream
1 tsp vanilla extract

Place chopped chocolate in a medium bowl.

In a small saucepan, bring the cream to a boil. Remove pan from heat and add the chopped chocolate. Let stand for 1 minute then gently stir until chocolate is melted and the glaze is smooth. Gently stir in the vanilla. Transfer glaze to a small bowl and cover the surface of the glaze with plastic wrap and let cool for 5 minutes at room temperature before using.

To glaze the cake:

Place the chilled cake, still on the cake round, on a wire rack set over a baking sheet. Slowly pour the hot glaze onto the center of the cake. Smooth the glaze over the top and sides, letting the excess drip onto the baking sheet.

Scrape the extra glaze from the baking sheet and put it in a small ziploc bag. Seal the bag and cut a tiny hole in one of the bottom corners. Gently squeeze the bag over the top of the cake to drizzle the glaze in a decorative pattern. Refrigerate the cake at least one hour before serving.

I've given up the fight


Dorie, you have won me over and I bow in homage to you!

While my Sunday's attempt at seduction did not yield the miracle results of my lounging, doing nothing, the day was not a total waste of housework and errands. I did have the time and opportunity to bake a cake.

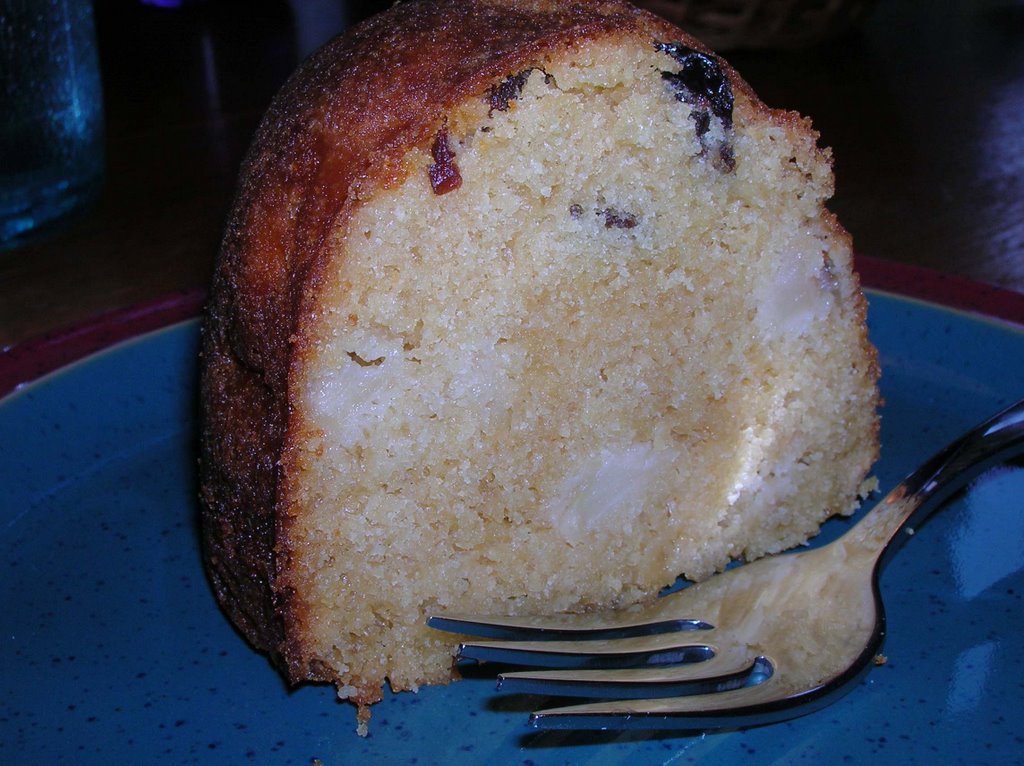
A brown sugar bundt cake, another recipe from Dorie's Baking: From My Home to Yours.

Initially this was intended as the treat of the week for lunch boxes. A sweet cake with chunks of fruit, in this cake apples and raisins replacing the initial pears and prunes (I had the pears, but not ripe, and the family won't eat the prunes.)

My plan failed however, when by Tuesday morning, it was gone.

I think that means they liked it!

This cake was good the day off, but Dorie was again right - it was even better the next day! A sweet crumb, not dense or delicate, with the flavors of the brown sugar and butter.

I've totally given up any pretense of reading this book but instead will now be picking and choosing from various recipes as needed.

Hmmm I wonder if my next book(s) will be as good?

SHF #28: Sweet Seduction


In a sense you could say I am easily seduced by sweets - or at least the prospect of sweets.

This entry into this month's SHF Sweet Seductions, hosted by Jasmine at Confessions of a Cardamom Addict is a prime example. It's not so much what I made as the fact that I am posting something in this blogging event when I had no plans to!

See? I was seduced into something sweet!

However this post is not about using something sweet to seduce my sweet (who I think is more easily seduced by spicy than sweet.) Instead I am choosing to tell you about the sweet I used to sweeten my family - filled with love and care.

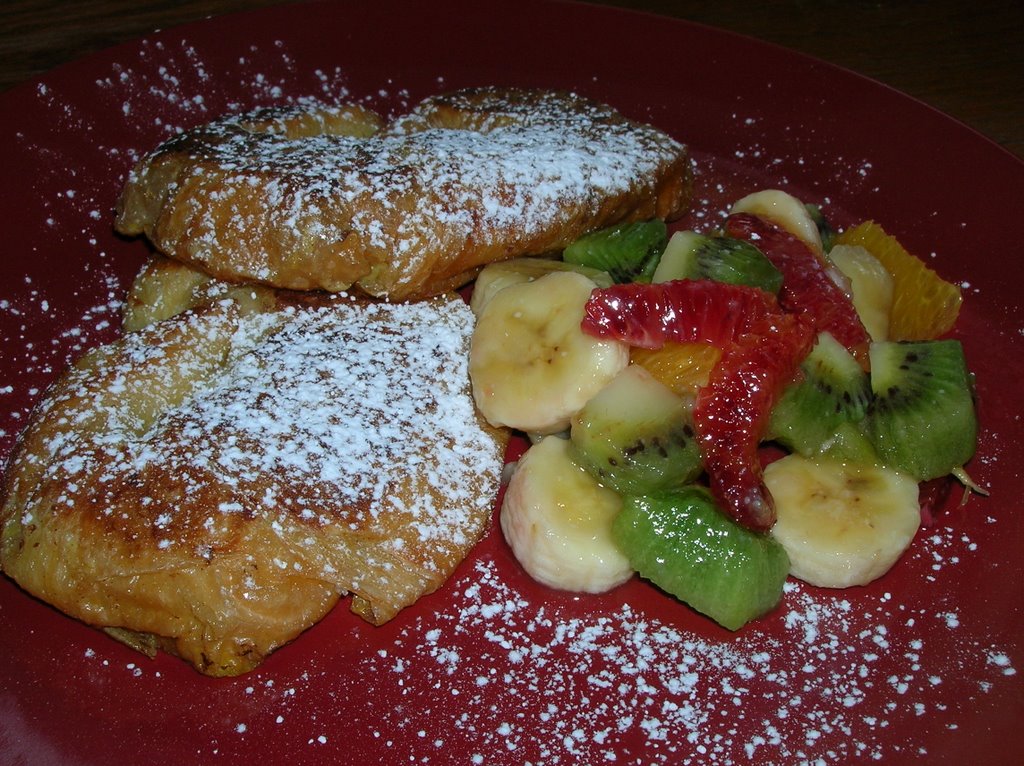
Such plans I had - lull them into submission with a decant breakfast, croissant French toast with fruit salad, and have them do my every whim for the rest of the day! While I lounged in the lap of luxury (doing nothing while still in my pj's), my family would be so grateful and full of desire to please me that they would scour my home from top to bottom, prepare weeks worth of meals for the freezer, run errands of every imaginable kind! And while I'm dreaming - rid my world of that cold, icy horrid stuff outside, not everywhere, but anywhere that I might have to be and go! And for even more fantasy - add a third bathroom in my house (no idea where it would go), one fitted with an empress sized bathtub with jacuzzi, bright windows, and self cleaning!

Alas, my seduction, sweet though breakfast was, as fresh as the fruit salad was (banana, kiwi, navel and blood orange), had little success. None of this happened. Instead I went about my normal errands, grocery shopping with a 4 year old, baked a cake, roasted a chicken, did things I would normally do on a Sunday. No new bathroom. The snow is still everywhere I look outside. And I need to dust.

Oh well, at least we had a good family breakfast!

Croissant French Toast

6 croissants, split in half lengthwise
4 large eggs
1/2 cup milk
1 tablespoon brown sugar
zest of an orange (use the orange for your fruit salad)
1 teaspoon cinnamon
butter for pan

Mix all the ingredients except the butter together. Heat a large, non-stick pan over medium heat and melt some butter into the pan. Dip croissant half into egg mixture and place cut side down in frying pan. Repeat until pan is full but not crowded (I did mine in 3's.) When bottom is golden and browned, about 3-4 minutes, turn over and cook other side for about 2-3 minutes, again until golden and browned. Repeat until all the croissants are cooked.

Serve with warm syrup, a sprinkling of icing sugar, and fruit salad on the side.

Proof that I still remember how to cook instead of bake!


Let me start by saying that while I am not a fussy eater, there are some things I will not eat.

I'm willing to try most things at least once, and am probably the most adventurous eater of all of my circle of family and friends.

That said, I have an extreme dislike of peanut butter, both in taste and smell. Makes me an oddball right there - I was usually the only person in an entire school who wouldn't touch peanut better. (Though I like peanuts.)

I dislike squash, though as an adult I have learned I like spaghetti squash. I also learned I liked sweet potatoes. I can't stand melons, though again, there is an exception: on a hot, hot summer day, if the watermelon is good, I like watermelon.

And I can't stand cucumbers. I will pick them out of my sushi, my Vietnamese wraps, my salads, Greek or garden, I don't care.

Yet I love tzatziki. Yes, I know it is shredded cucumber. But there is so much garlic and yogurt that the cucumber is merely coloring!

With that in mind, I decided to experiment on Friday night with a new type of burger - Greek burgers.

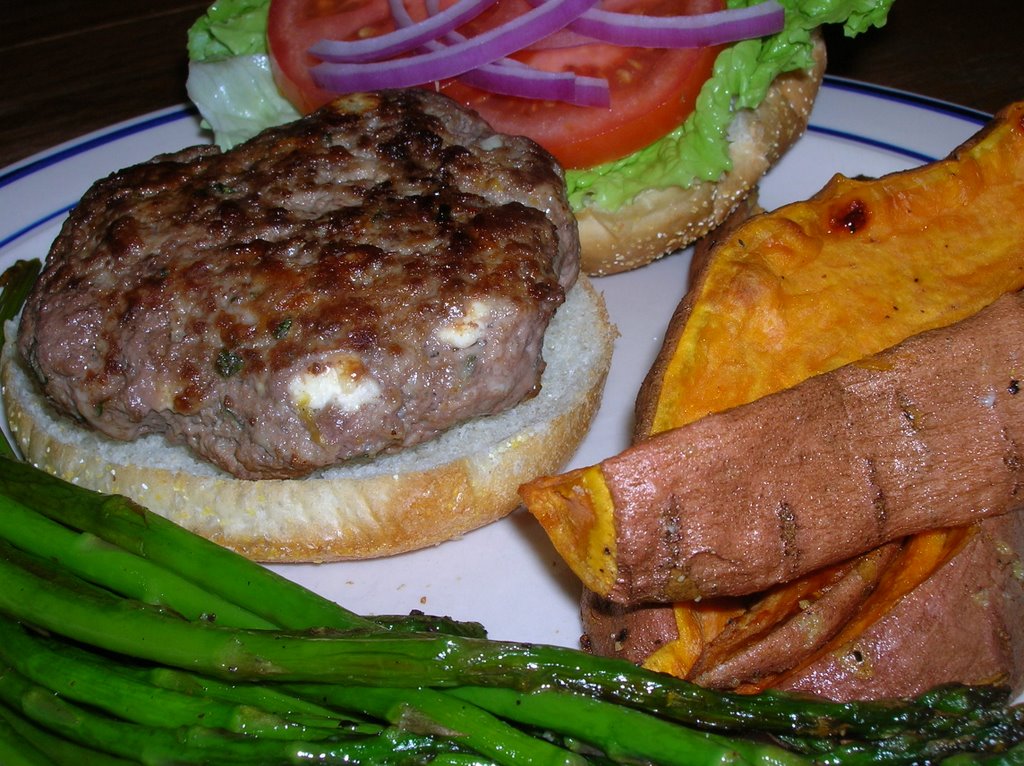
I mixed roughly equal amounts of ground lamb and lean ground beef into a bowl with lemon zest, lots of chopped garlic, and fresh, chopped oregano. Into that mixture I gently folded in small chunks of feta (another odd food thing of mine - I like real chunked feta but won't eat the crumbled stuff that passes for feta in restaurants. Oh, and I don't like olives.)

The burger patties were cooked in a fry pan over medium-high heat, turning a few times but being careful not to push down on them. While they cooked, I oven baked some sweet potato fries (as well as some wedged baked potatoes for the rest of the family who won't eat sweet potatoes), and oven roasted some asparagus, both tossed in olive oil, salt and pepper.

The burgers, when cooked through, were served on a bun that had been slathered in tzatziki and dressed with lettuce, ripe tomato and red onion slices. Hmmmm.

It was so good I had one for lunch the next day! (Oh and I froze a couple of extra patties for future lunch use.)

This meal was entirely about me - I knew my husband wouldn't be interested in it, so he got what I called bbq burgers, ground beef with salt, pepper and bbq sauce, while the kids half ate their Greek burgers. It didn't bother me in the least that no one else shared my happiness over these burgers - it meant there was more for me!

Believe it or not, sometimes you can have too much cake


We had an entire weekend of birthday.

First, on Saturday, we had a gaggle of kids in the house to see a magician, and enjoy cupcakes and loot bags.

Sunday was the "family" party, with more cake. And left over cupcakes.

The actual birthday was on Monday the 12th. And by then we had had enough of cake, whether a big one or in cupcake form.

I'm a mother, however, so there is no way I could let the day go without some sort of celebratory treat. Afterall, I once went through labor and a c-section to have this child. I needed a treat!

Sure, I could have gone very fancy and made a pie or a tart. Or just made individual cookies that could be made into ice cream sandwiches, the perfect dreary winter type dessert (that makes you long and appreciate summer even more.)

Yes, some people would appreciate the fancy. But we are talking about an 8 year old boy. He doesn't want fancy. He wants lots and yummy, in that order!

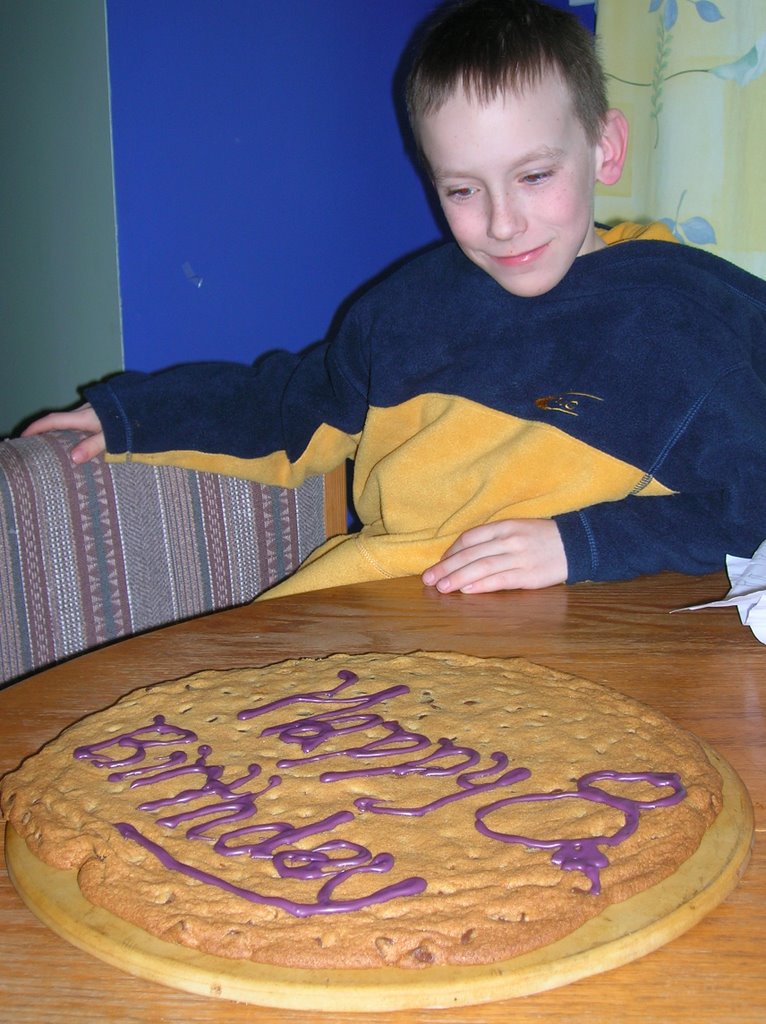
Instead I went both simple and grandeur at the same time. Cookies, yes, but not many little cookies. I went BIG! A giant cookie, large enough to be written on, and perfect for a low key celebration.

Rather than go to my standard chocolate chip cookie recipe, I instead went with the classic Toll House recipe, which I had actually never made before. And I stuck to the recipe, with no tweaking or changes (except the usual omitting of the nuts.)

I had a bit of a size issue - my cookie puffed and expanded a bit unevenly, so I ended up fishing out a few knocked off pieces off my oven floor, but all together baked up beautifully. Crispy edges, soft interior, a good ratio of cookie to chips.

And completely successful in the eye-popping, WOW department for the birthday boy.

Then I added to his surprise by serving him some of his giant cookie with a big scoop of homemade chocolate ice cream.

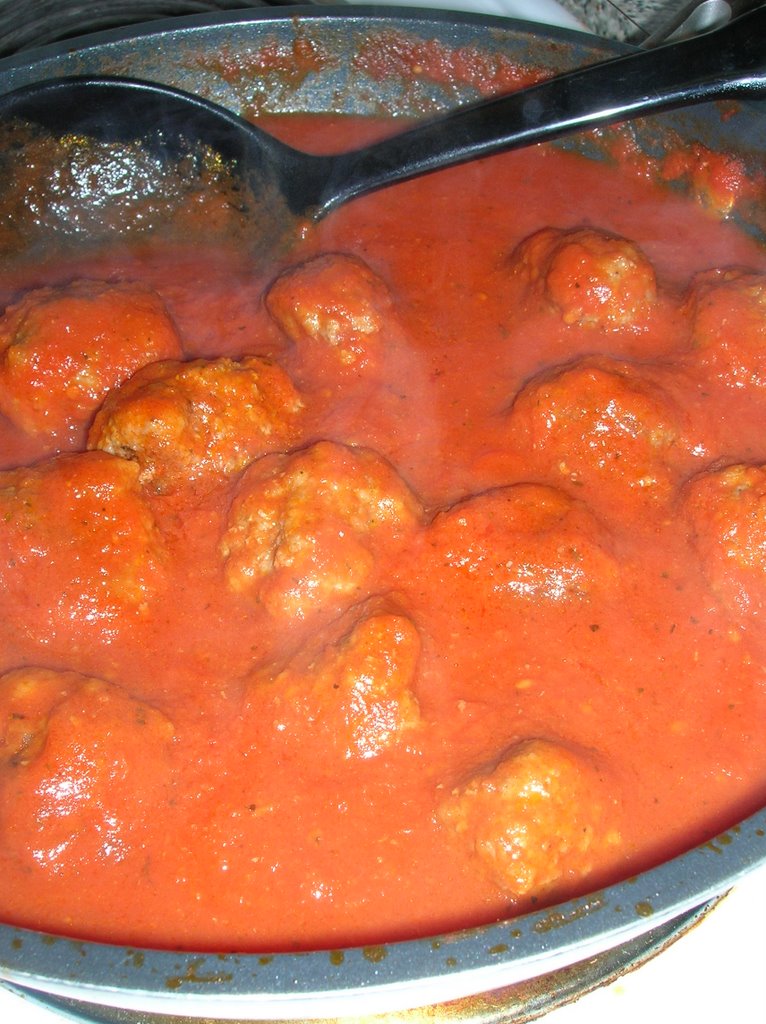
Can you think of a better way to follow up on a spaghetti and meatball dinner than cookies and ice cream, both loaded with chocolate?

While chilling my ice cream, I was reminded of a recent post by Brilynn where she made ice cream and cooled down her mix by putting the pot into a snowbank. I admit, I was tempted. We had the cold, and the snow. What I didn't have was trust - I was leaving to bring the littlest one to school and didn't trust that my pot, or covered bowl, would stay untouched in a snowbank! (I guess I could have tried my closed in backyard, but didn't think of that until just now.)

Instead I chilled it in a sink full of ice water.

Despite the unadventurous chilling, my ice cream turned out smooth and chocolatey. I hadn't bothered measuring out the 5 ounces of chopped chocolate, reasoning that more wouldn't hurt it and that my scale is not very good (which it really isn't.)

Oh and I made a few more tweaks:

I only had 1 1/2 cups of heavy cream so subbed in light cream for the balance. I had 1% milk instead of whole milk, and I added an extra egg yolk to make up for the thinner milk/creams and to help with the custard.

So much for following a recipe through the first time!

Finally the birthday is done, all the presents are opened, and we can get back to normal. Now, what was a baking before all this cake stuff came around? :-)


My recipe, btw, came from the book that came with my ice cream machine, and here it is, the original recipe, not my tweaked version. If you'd prefer to try mine, just make the changes listed above.

Rich chocolate ice cream

5 ounces semi-sweet chocolate, chopped
2 cups heavy cream
2 cups whole milk
2 egg yolks
1/2 cup sugar
1 tablespoon pure vanilla extract

Combine milk, cream and chocolate in a medium sauce pan over medium heat and cook until mixture almost boils and chocolate is melted, about 5-8 minutes. Reduce heat to low.
Meanwhile, beat yolks, sugar and vanilla in a small bowl until light yellow and smooth. Add 4 tablespoons of warm cream mixture and stir until combined.
Gradually add egg yolk mixture to warm cream, stirring continuously to prevent the eggs from curdling. Cook over low heat until slightly thickened and mixture coats the back of a spoon, about 3-4 minutes. Cool completely. Stir gently and pour into freezer bowl. Follow machines instructions for mixing and chilling ice cream.

Call me a rebel

No sooner had I said I would finish the book, I turned around and made another recipe from it.

Right now no one is asking, "What book." You just know.

The BOOK.

Very quickly becoming a bible for bakers and bloggers.

And right now you'd have to pry it from my dead fingers to take it from me.

Yes, it is that good.

I had plans to make a sheet cake on Sunday morning. A vanilla sheet cake with chocolate icing, both recipes from The Barefoot Contessa. Then I ran into a snag - where do you get a sheet pan that is 12 x 18 x 1 1/2? The 12 x 18 part is easy. It is the extra 1/2 inch I couldn't find, though Ina says she gets here sheet pans at William-Sonoma, Crate & Barrel and Sur La Table. All stores I don't have in Ottawa. (Note - I found one, at a local craft store - 12 x 18 x 2!)

I must have been dreaming of recipes and websites and cookbooks all Saturday night, trying to figure out what I would make for Sunday's party, the family celebration of my son's 8th birthday. It was a restless night, tossing and turning, my mind churning.

Until I gave in.

When I woke up I turned on my laptop, did a few quick searches, nothing serious, then pulled out Dorie and picked a cake.

Not just any cake - the cake. The cover cake, The Devil's Food White-out cake.

I'd never made a marshmallow frosting before - or cut two layers into four. My normal nerves at trying something new, especially when I had 20 some people expected to come that evening, left me and I dove right in, confident that I would not have problems with this cake. The recipe would be clearly written and easy to follow, I was sure.

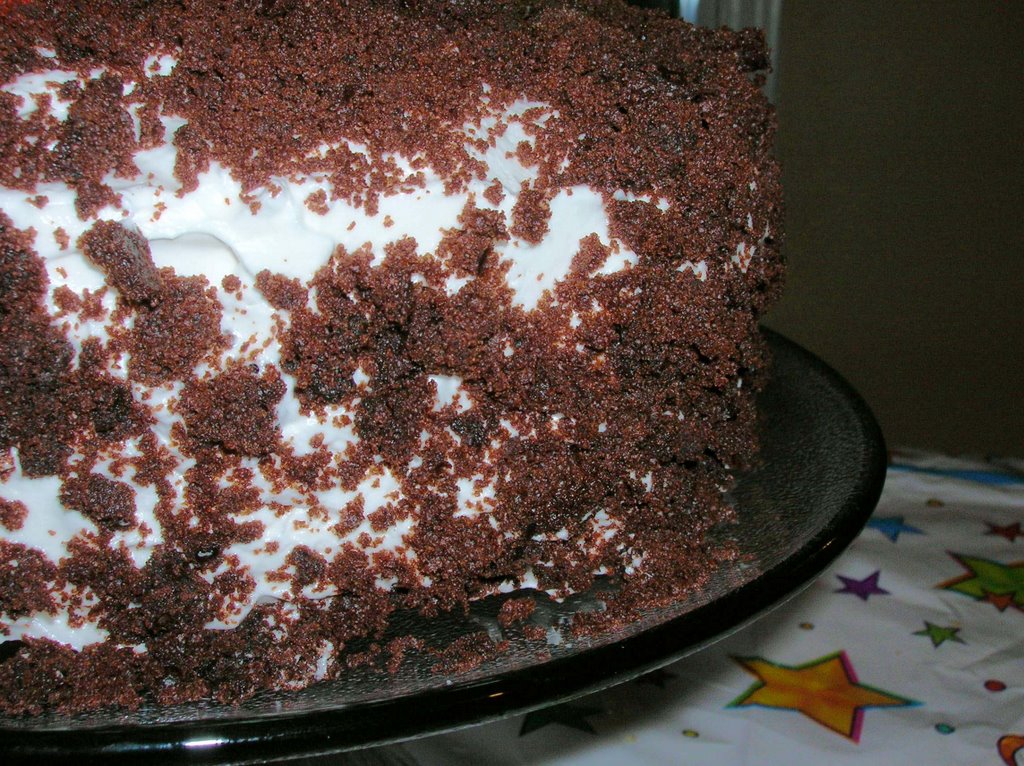
Two days later, I can't tell you if it was easy to follow or not, most of the baking process is now a blur, but either way, I did not manage to screw it up. Though I didn't notice until afterwards that the front cover cake does not have the crumbs on the top whereas the picture inside the book (page 246 if you have it), does.

And only now, two days later, am I reading the part that says to use a serrated knife and a sawing motion to cut. No wonder they had such beautiful, un-crummy slices!

This cake satisfied children and grown ups alike. My children were swooning, yes, swooning, over the marshmallow frosting. The birthday boy had the honor of licking the whisk attachment clean from the mixer, but both were able to sample the frosting before it went on the cake.

And there is ample frosting to go with the cake. I actually should have put a more generous amount between the layers, but erred on the side of caution. Next time I'll know better.

Mark my words... there WILL be a next time.

So if you are looking for a showstopper type of cake that is both delicious and not overly sweet (despite the mountain of marshmallow involved), it is on page 247.

Oh, and for those who wonder - no this cake does not serve 20+ people. We had a few cancellations but also had left over cupcakes from the previous day's children's birthday party.

Is it wrong to lick the crumbs off your plate?

Trust me - this picture is awful (and unfortunately was the best of the bunch) but the brownies themselves are simply decadent.

Chocolaty, fudgy brownies on the bottom, topped by chocolate chip cookie, recipe courtesy of Dorie Greenspan.

Most of the blogs that I follow, drool and envy, have all been cooking with Dorie Greenspan's Baking From my home to yours. The pictures and descriptions talked about from this massive tome were wonderful. Beautiful pictures, mouth watering baked goods, and rave reviews. How could I resist running out to get myself a copy of the book?

(Actually I did resist, so close to Christmas - then I was given a gift certificate at a book store and ran, ran, ran!)

Now 'regular' readers know that I have a self imposed rule about my cookbooks - read them first, then go back and make stuff from them. Occasionally I am so tempted by something I break that rule.

When I started reading Dorie, I had a hard time not heading to the kitchen as soon as I started reading the book. I actually wondered if it was a bad idea to start at the beginning of the book and just bake and read in tandem. Really. Would that be a bad idea? (Other than for the waist lines of those of us who live here.)

On to the recipe. It isn't complicated. It's brownies and chocolate chip cookies, baked together.

Chipster-topped brownies

For the brownie layer
6 ounces bittersweet chocolate, coarsely chopped
3 ounces unsweetened chocolate, coarsely chopped
2 sticks unsalted butter, cut into chunks
1 2/3 cups sugar
4 large eggs
1/2 teaspoon salt
1/2 teaspoon vanilla extract
1 cup all purpose flour
1 cup walnuts, coarsely chopped (I left these out)

For the cookie layer
1 1/4 cup all purpose flour
1/2 teaspoon baking soda
1/2 teaspoon salt
1 1/2 sticks unsalted butter, at room temperature
3/4 cup packed light brown sugar
2/3 cup sugar
1 large egg
1 large egg yolk
1 teaspoon vanilla extract
6 ounces bittersweet chocolate, chopped into chips, or 1 cup store bought chocolate chips

Preheat oven to 35o degrees F. Butter a 9x13 baking pan, line it with wax or parchment paper and butter the paper. Put the pan on a baking sheet.

To make the brownie batter, put both chocolates and the butter in a bowl set over a saucepan of simmering water. Stirring occasionally, heat just until the ingredients are melted, shiny and smooth. Remove the bowl from the heat.

Working with a stand mixer fitted with a paddle attachment, beat the sugar and eggs on medium high speed for about 2 minutes, until pale, thick and creamy. Beat in the salt and vanilla extract. Reduce the speed to low and mix in the melted chocolate and butter, mixing only until incorporated. Scrape down the sides of the bowl with a rubber spatula, then, still on low speed, add the flour, mixing only until it disappears into the batter. If using the walnuts, use the spatula to fold in the walnuts before scraping the batter into the prepared pan. Set aside.

To make the cookie dough, whisk together the flour, baking soda and salt. Working with the stand mixer in the cleaned bowl, beat the butter and both sugars together on medium high speed until smooth and creamy, about 3 minutes. One at a time, add the egg and the yolk, beating for 1 minute after each addition. Beat int he vanilla. Reduce the mixer speed to low and add the dry ingredients, mixing only until they disappear into the dough. Still on low, mix in the chopped chocolate. Drop the cookie dough by spoonfuls over the brownie batter and, using a spatula and a light touch, spread it evenly over the batter.

Bake for 50-55 minutes, or until the cookie top is deep golden brown and firm and a thin knife inserted into the brownie layer comes out with only faint streaks of moist chocolate. Transfer the pan to a rack and cool to room temperature.

When the brownies are completely cool, carefully run a knife between the sides of the pan ad the brownies, then invert them onto another rack, remove the paper and turn right side up onto a cutting board. Cut into bars about 2 inches by 1 inch.

I actually came pretty close to following this exactly. I was short 1 ounce of unsweetened chocolate, and was using all 6 ounces of bittersweet that I had, so used 1 ounce of semi-sweet chocolate and reduced the sugar by a bit. Didn't measure, so not sure exactly how much.

I omitted the nuts, but then I always do.

And 1x2 inch squares were so small that after the first one, I cut larger. Even larger I still had brownies for lunches, desserts and whatever snacks all week.

Now to get back to reading the rest of the book. After all, I only had the willpower to make it to page 94 of the book before I had to go bake from it. There are almost 500 pages of recipes in this book though, so I doubt I will make it to the end before I bake from it again.

Oh well! Breaking rules should always taste this good.

The 3 day Linzer cookies that weren't


Actually, these cookies started sometime after Christmas, one day when I was at the mall with my teenaged brother. He wanted music and I was just there with him.

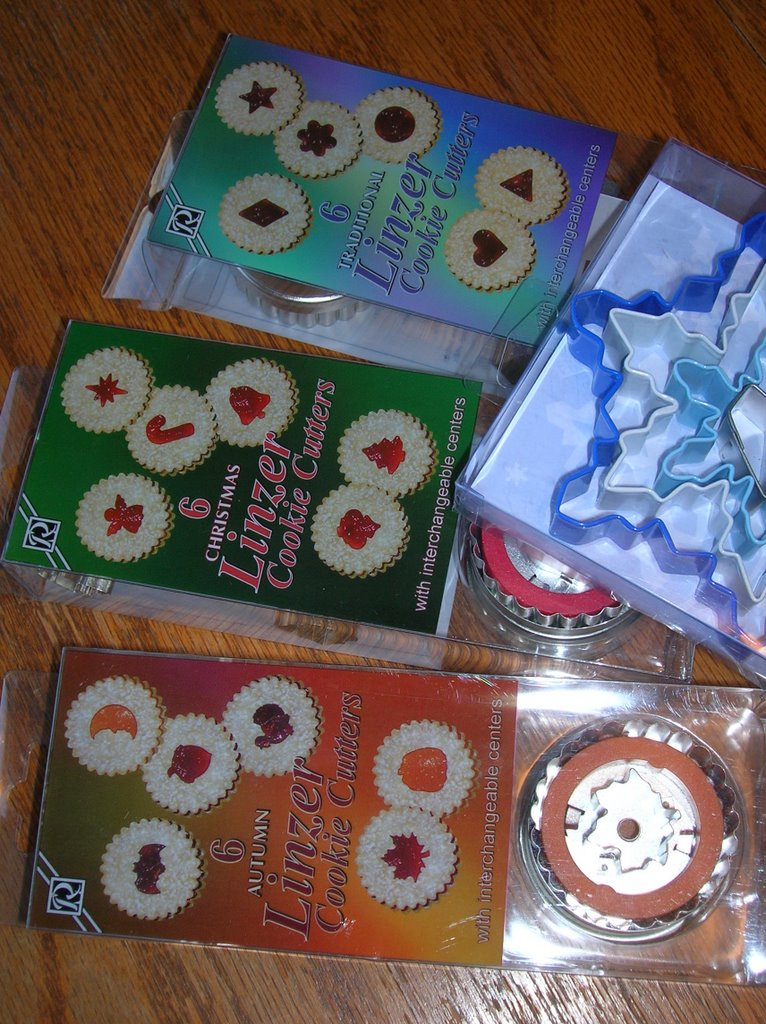
When we left that mall, he had a heavy metal cd that made me shudder, and I had 4 new sets of cookies cutters, purchased at a 50% off clearance sale. Three sets of Linzer cookie cutters and a snowflake set.

I admit, I had no intentions of making Linzer cookies. They seemed fussy, with the two layers, and jam is not something I want in my cookies.

I admit, again, I bought 3 sets of Linzer cookie cutters for the cut out centers. Yes, the cute little center cut outs. I ended up with the traditional centers: diamond, heart, circle, star, flower and triangle. I bought early for next year, a Christmas set of angel, candycane, Christmas star, bell, ornament and tree. And the more fun Autumn set of pumpkin, acorn, turkey, maple leaf, moon (with little face) and bat.

All so I could make little itty bitty cookies and crackers in fun shapes for my children. (Or me.)

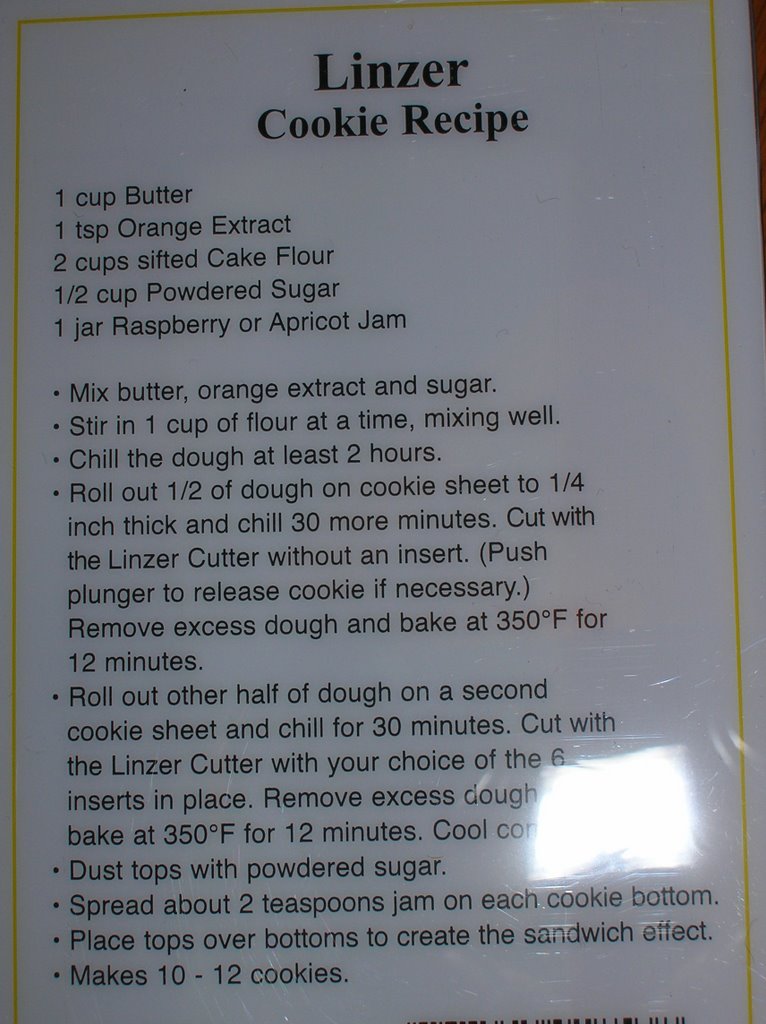
For one reason or another, not sure what it is, I suddenly had the desire to make Linzer cookies. A brand new jar of raspberry jam was waiting for me, and the recipe on the back of the cookie cutter boxes did not involve any kind of nut. So I threw together the dough and put it in the fridge for the minimum of 2 hours of chilling.

Then I forgot about it.

I forgot about it that day.

I forgot again the next day. (Which was very busy.)

Three days later, I pulled out my dough to allow it to warm up slightly before I started rolling and cutting. I set up my counter, having cleaned and dried it off, sprinkled some flour on it, turned on my oven and gotten out my rolling pin and my cutter of choice.

An hour later the dough was still cold and very, very hard.

It was also crystalized on the surface. Actually, it seemed crystalized everywhere.

Two hours later and not much had changed. The dough wasn't cold anymore, but it was still hard and very crumbly. Not exactly a good candidate for rolled cookies.

So I threw it out.

And then went looking for a sugar cookie recipe (my previous search for a Linzer cookie recipe revealed only 2 with no nuts in it - the one I made and one from Cooking Light, though it required things I didn't have on hand. Like egg substitute.) As usual, I ended up here.

This dough made good cookies. Easy to roll, did not get tough when I rerolled (and rerolled) the scraps. Baked up golden brown on the bottom, perfectly colored on the top. And melded very well with the raspberry jam and icing sugar.

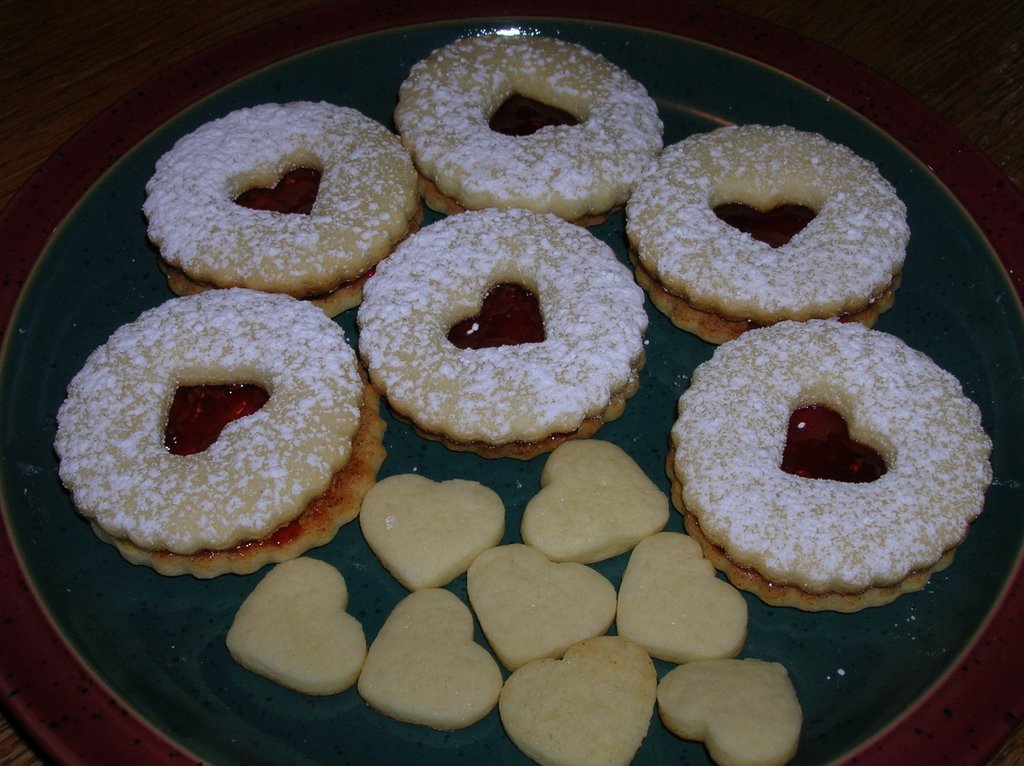
And the little heart cutouts were so cute!

I have had excellent feedback on these, from both the usual, and some unusual sources.

Another admission - a week later and I still have half the cookie dough in my fridge. I suspect it will be fine and will roll and bake just fine.

Which is good - I have company coming soon and a few Linzer cookies, heart ones of course, would be a perfect thing to serve them with their tea!

Beautiful Valentine's Art

I guess I should have checked Friday's mail before today!

Then I would have known before this afternoon (Sunday) that I had received my postcard from the Valentine's BPW that I mentioned a few blogs entries back, here.

Only I didn't get a postcard.

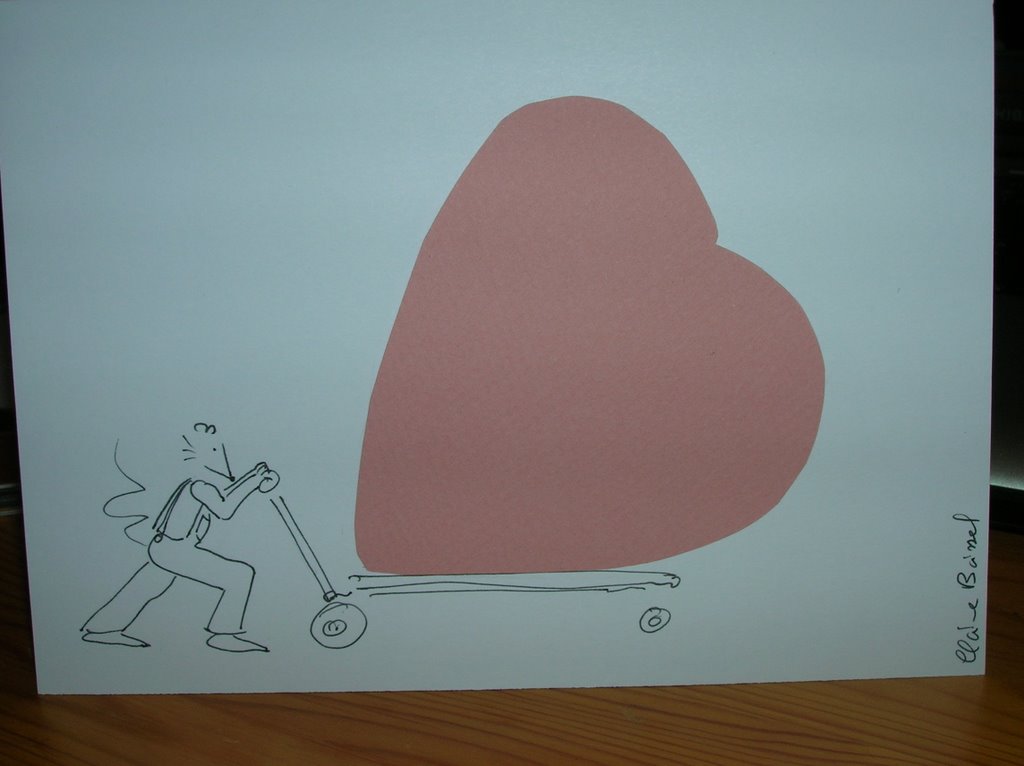
Instead I received a beautifully hand drawn card all the way from France, sent to me by Plume of Multiple. In it, Plume tells me that she is an artist, both in music and in drawing, and that she had drawn this picture just for me!

Plume's blog, however, is pretty well entirely in French, and my French reading skills are even worse than my speaking! I guess this is an extra incentive to practice them.

(I think I need to go find a frame for my postcard now, so that when Plume is a famous artist with published books or her work, I will have mine, nice and safe.)

Thanks to both Meeta and Plume!

Which will kill me faster?

Reading the daily entries of the current 83 food blogs I have tagged for my feed (and growing), or eating all the wonderful recipes I try from them!

I guess I really need to update my sidebar to include more of my favorites.

Happy Croissant day!

Otherwise known as - How the crazy lady spent her weekend.

So back in December, I read a post on several blogs about a cross-blog baking effort for chocolate biscotti. It looked like so much fun, all these bakers making the same recipe on the same weekend, that I asked to join in. (There were times this weekend where I felt I should have kept my fingers from asking!)

But I didn't, so this weekend I tackled the task of making croissants for the first time. Yes, the baker who doesn't like to roll her own pie crust dough made croissants. Ironic, isn't it?

And before I get much further - don't forget to visit the blogs of the rest of us crazy ladies and see how their croissants turned out: Ivonne of Cream Puffs in Venice, Peabody from Culinary Concoctions by Peabody, Helen of Tartelette, Veronica of Veronica's Test Kitchen, Lis of La Mia Cucina, and Brilynn of Jumbo Emphanadas.

I didn't have a recipe for croissants (the whole idea of making them caused a bit of anxiety actually) but Ivonne was kind enough to scan and send off the recipe we were making, from Tartine by Elisabeth M. Prueitt and Chad Robertson. It was 5 pages long! And was quickly followed up by a schedule by Veronica, to make things easier for us!

Oh how I read and reread those instructions and that schedule. I even made my own notes, using lots of color, and to be safe, taped them to my kitchen cabinets for quick reference.

I'm not going to copy out the recipe here - if you want to make your own croissants using the same recipe, see Veronica's blog. She did a great job of copying out the entire recipe, including her own notes.

Thank goodness for the support system of the girls this weekend - we shared over 100 emails over the 3 days! That's right - 3 days of making croissants!

So let's start with Friday. Friday was prep and preferment day, if I wanted an overnight preferment, which I did. My preferment seemed to work out fine, though at one point one of the girls had me running to my fridge to see if it was turning into a sponge or a ball of dough!

Mine was a sponge, thank goodness, as I'd run out of yeast, having premeasured my ingredients for the next day, including the yeast needed.

Saturday morning had me up mixing the sponge with more yeast, 6 more cups of flour and a few other ingredients. I thought my poor mixer Bob was going to die on me!

He persevered for an entire 4 minutes, however, which let me move onto the next step, the first chill and rise.

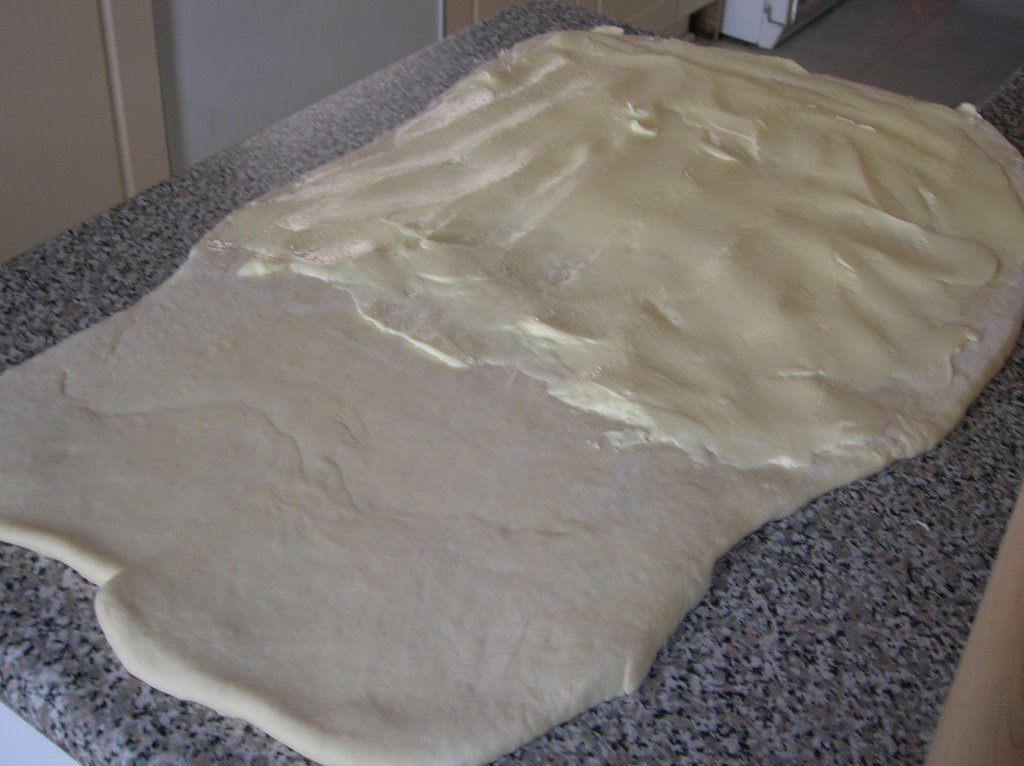
I used an extra large ziplock bag to store my dough in while it rose, so I didn't have the problem of the dough rising through the plastic wrap or smaller bag. (Though at least then I would have known how much mine had risen.) The next step involved rolling out the dough to laminate it - as in smear it with lots and lots (and did I mention lots?) of butter. Where I ran into my first problem:

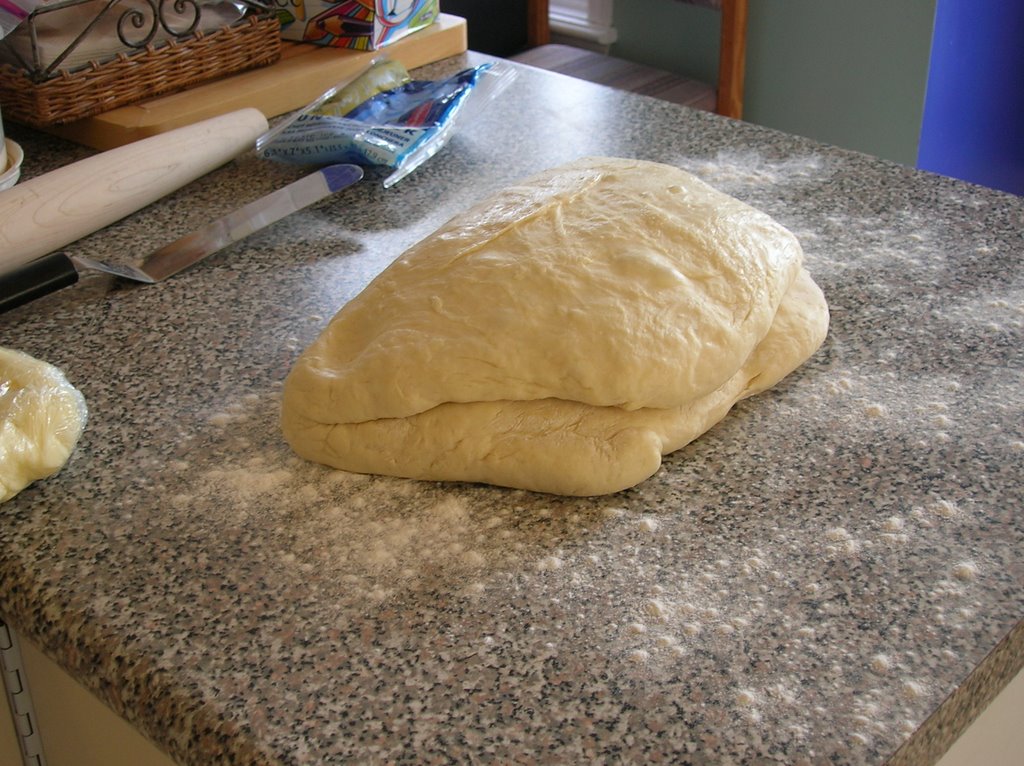
My counter was not big enough!

I was supposed to roll it into a rectangle 12 inches by 28 inches. My counter is only 26 inches.

And do you know how hard it is to roll out that much dough into a rectangle? And then spread butter evenly over the surface without melting the butter or tearing the dough?

Well I didn't, but now I do.

I think it looks kinda rectanglish. It was straighter before I started smearing the butter on.

Folding the dough into my plaque wasn't as difficult. I'd been practicing. On playdough. :-)

Okay and a few years in printing, knowing how to do a letter fold didn't hurt either.

So I did it again - roll out into a too short rectangle, fold over. Chill, then repeat. Three times in total.

I don't know why my arms weren't sore.

Next was break time. Time to freeze the dough for awhile, then unless I was so inclined as to be baking croissants at 11pm at night, let the dough chill and rise in the fridge over night. I was not so inclined, and chose to wait until morning to start cutting and baking my croissants. I would have warm croissants for breakfast on Sunday morning!

Now remember how I said I had read and reread the instructions? And remember how I frequently still forget things? Well this time I had forgotten about the rising time after cutting and shaping.

No early morning croissants for me!

Actually, maybe I did remember - and that is why I woke up at 3:30am thinking I needed to get moving on my croissants! (I wasn't so inclined then either, so rolled over and went back to sleep.)

Now Peabody had made her croissants earlier in the week and had said they were "on steroids."

So after more email consultations, I went with the suggestion to divide my dough in half and make mini croissants instead.
But really, no offense to the authors of the recipe, but how the heck did they get all their giant croissants on one half sheet pan and still have room for rising? I used 4 full pans and one little bar pan for the last bit, giving my croissants lots of space to rise (which they barely did, so I must have done something wrong somewhere, or my yeast was dying.)

Some of mine rolled beautifully, others were barely passable. I think I should have also practiced that step with the playdough. Oh well, too late now!

Shaped and rolled all the croissants, leave them to rise. Note to self - do not forget to preheat oven!

I actually didn't forget to preheat the oven. What I forgot was to pull the sheet out I had rising in there (I'd run out of room elsewhere) before I turned it on!

Quick, quick, pull them out of the oven - oh wait, too late for this batch, it's already puffy and golden and half way cooked.

Now once again, remember that rereading part? Well forgetting that one sheet totally threw me off the entire rest of the recipe. I forgot the egg wash, which I was supposed to slather all over my croissants at least 10 minutes before I put them in the oven!

And do you know when I remembered about the egg wash? As I was rotating my last sheet of croissants, half way through the baking.

No purple check mark through that stage of the recipe. No extra golden color on my croissants.

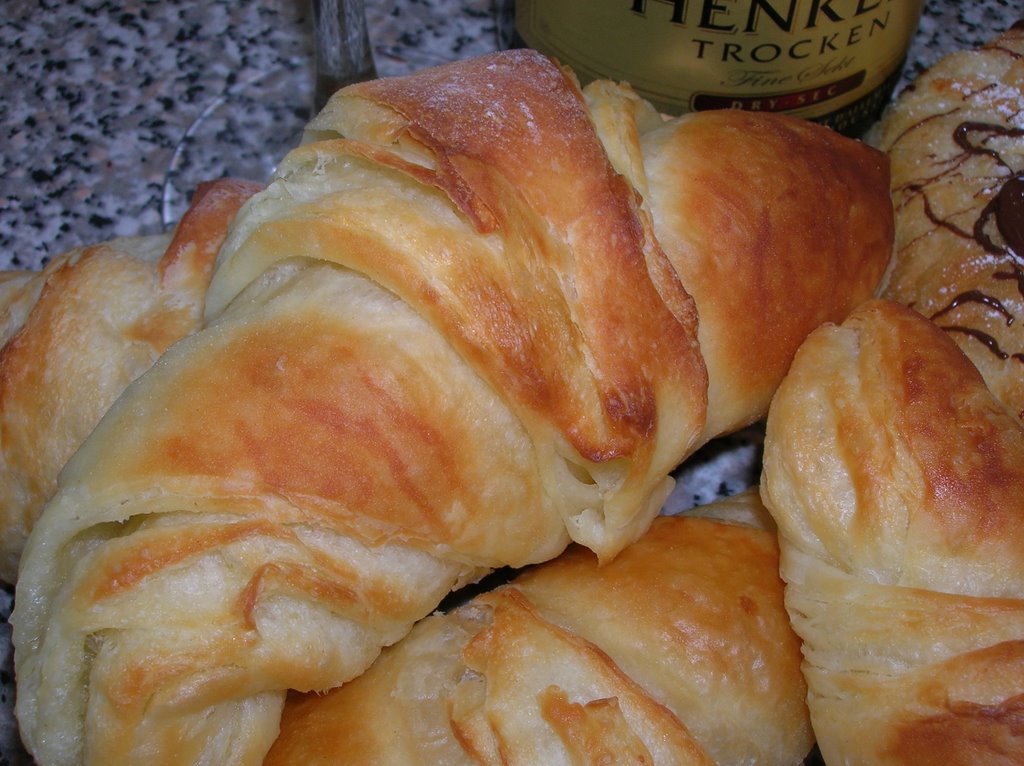
Hey wait a minute! Look at my croissants! I forgot the egg wash and yet they are golden and browned! They aren't on steroids, but they are light and airy and flaky.

So what was that egg wash for again?

Now the recipe called for a few optional variations on the basic butter croissants. As wonderful as the "plain" recipe is, a change will be welcomed. Afterall, how many butter croissants can one family eat before they need something different?

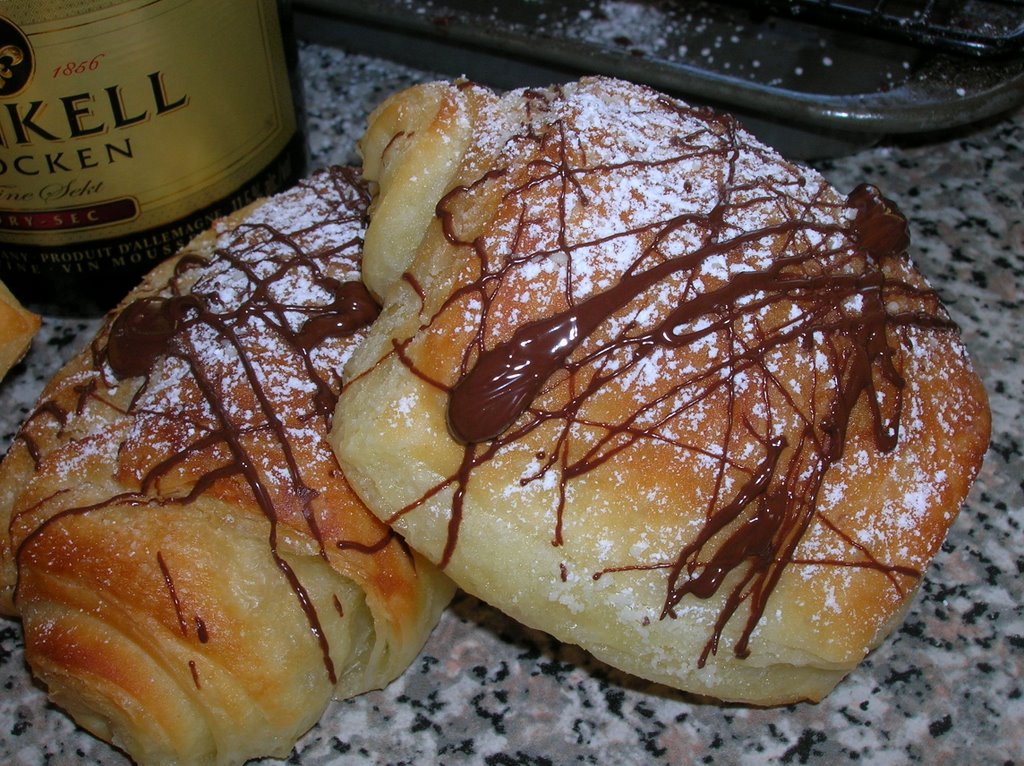
So in addition to the "plain," I also made some chocolate croissants, rolled in rectangles instead of the traditional crescent shape, nestled inside each square of puff pastry a square of dark chocolate. No wimpy milk chocolate here! I need quality and flavor, or it will be lost inside those folds of butter.

In the end, I made 30 mini croissants, and a dozen chocolate croissants. The chocolate ones were so popular with my children that they are gone, long gone, with both children having requested one in their lunch yesterday.

Phew! Baking over, croissants made, kitchen still in one piece, husband still talking to me!

And 6 great friends to help out via email!

I do not think I could have done this without the help and support of the girls. We reassured each other that, yes, the butter was going to melt out no matter what, that it was okay to forget the egg wash, (and lose the milk in the pantry), to make mini croissants. And that yes, it was completely normal to eat half a dozen croissants as soon as they came out of the oven, warm, crisp and golden!

So I raise a glass to you girls on a job well done!

And I look forward to next months recipe, provided it doesn't involve making croissants again!


BPW: Valentine's Around the World

The last time Meeta organized BPW, she had the tough job of selecting who sent a postcard to whom. This time likely isn't any different!

And this time she had a bit of revenge: she gave us a theme!

I have to ask - have you ever seen a Valentine's postcard anywhere? I haven't. Lots and lots of cards. No postcards.

I know for sure that I am not the only person who didn't find a postcard and instead has "faked it." Sorry, no other word for it - we faked it!

I hope my BPW recipient isn't too disappointed with it. It is a Valentine, and it won't come in an envelope, so that makes it a postcard, doesn't it?

Hopefully I will get my postcard before Valentine's day!

SHF #27: Chocolate by brand (Very, very late but better late than never!)

I learned this week that no matter how many times I read and reread something, it doesn't mean I will remember it.

Such as the date of submissions for this blog event, Sugar High Friday: Chocolate by brand, hosted by David Lebovitz.

I was convinced the final date was Friday the 26th. Turns out it was the 22nd. I learned this as I was taking my item out of the oven.

Despite this, I see no reason not to share the chocolaty goodness that was my choice for SHF, chocolate torte with chocolate ganache.

I'm not a huge fan of dark chocolate, I admit. I like milk chocolate (especially if there is caramel involved in some way.) But I do admit that dark chocolate is superior for baking with. Because of its intense chocolate flavor, it is less likely to be dulled by other ingredients. I just won't eat it straight.

I will also admit, I was limited in my choice of chocolate by what they had on the shelves at the local drug store (which does have a pretty decent grocery section, which is why I went there instead of going to a grocery store.) I simply did not have the time this week to get to a gourmet store to buy the best quality chocolate I could find, even had I been so inclined to do so. I wasn't inclined.

Besides, Lindt is a pretty good chocolate (and again, one I don't want to eat out of hand, or at least I don't like their milk chocolate truffles.)

Okay, enough about my chocolate likes and dislikes - and onto the cake itself!

I had an afternoon to myself, both kids at school, no work and a relatively clean house. (Note to self though -next time don't try making dinner and the cake at the same time. Bad idea.)

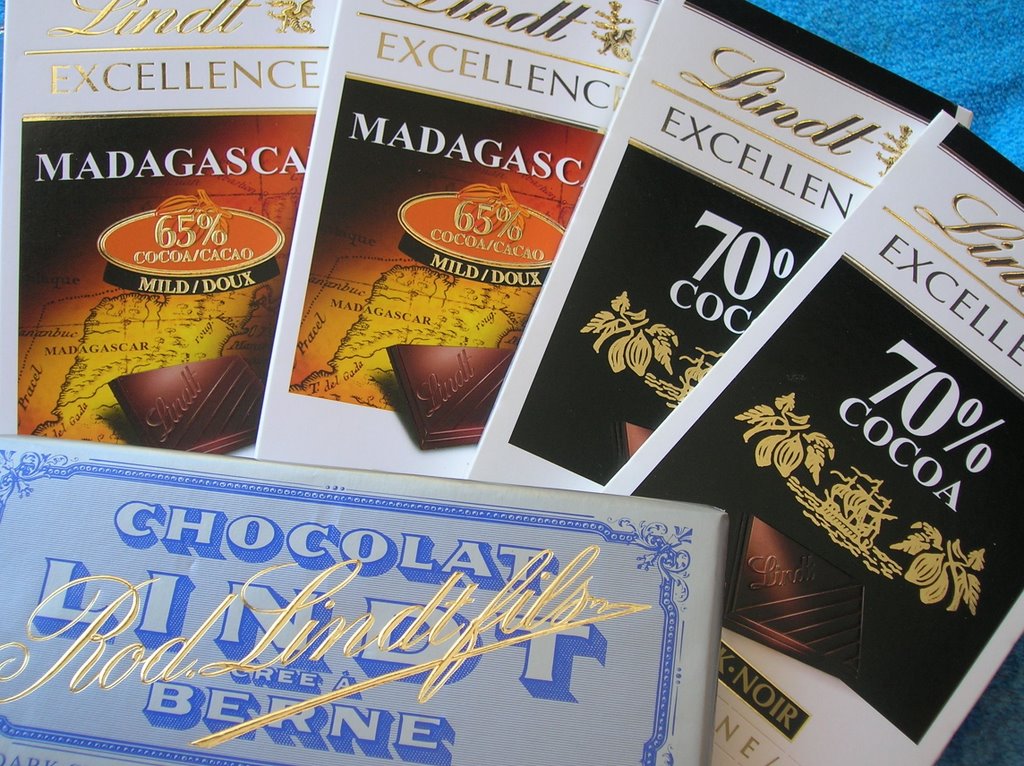
My chocolate choices, as I've mentioned, were Lindt. I bought 3 kinds: 2 bars of 70% cocoa dark, two bars of 65% Madagascar dark mild, and one bar of Swiss dark chocolate, who's cocoa content were not listed. Each of the % bars were 100 grams, which is why I bought the third kind. It came in small pieces and could be broken up and added in to make up the weight difference. Plus I had 3 small squares of the 70% cocoa bar in my pantry, which allowed me to get the full weight of 257 grams of chocolate with only a few small pieces of the Swiss chocolate.

The 70% cocoa chocolate melted beautifully with the butter, giving me a shinny, smooth consistency, and Bob the mixer was happy to whip up the egg whites until light and fluffy. He'd done an equally good job at mixing the egg yolks with sugar earlier. The batter I poured into my springform pan was light, airy, and very chocolatey!

I only ran into one small hitch on this recipe. (Isn't there at least one for every recipe?) Seems I don't own a 9 x 3 springform pan. I own a 9 x 2 1/2. So my cake baked a bit above my pan, which meant it crumbled a bit more than it likely should have when I turned it out and later when I plated. Not that it had any impact at all on the taste.

This cake is not "pretty". It has cracks all over it, crumbles and leaves a big mess. Which makes it perfect for playing with. And my version of playing with was the ganache, which I made with the 65% chocolate, again with a few squares of Swiss to make up the weight difference.

Again, the chocolate melted beautifully into the cream, smooth and glossy. And I didn't want to pour it over my cake as an icing. Besides, crumb coating my cake would have taken alot more chocolate ganache than I had!

Instead I went fancy, pooled some of the ganache on the plate, with little drizzles for affect, placed a slice of the cake, and then poured more ganache over the top.

Can you say chocolate over load?

I had to get this cake out of my house fast! Otherwise I would have been eating it for breakfast, lunch, dinner with some snacks in between! It was deemed too rich for the children (by the children, not by me.) Good thing I have friends willing to be my assistants. Three friends were the recipients of cake, served up on a plate with a ball of ganache/truffle along side, for them to enjoy at home. I haven't heard any complaints so I think they enjoyed it.

If I've learned anything about this SHF it is to keep a closer eye out on the dates. Write them down, several times and in several places! Maybe next time I'll get it on time.

What's in my basket (or yours?)

Rachel, the creator of two food blogs, Food Maven and Coconut and Lime, is the hostess of a what looked like a really fun blog event - What's in your basket?

The rules were simple: go grocery shopping, take pictures of what you bought, blog about it, including what you bought, what you spent and where you went shopping. Just like it is an education to see what other people are cooking, it is equally fascinating to see what people are buying.

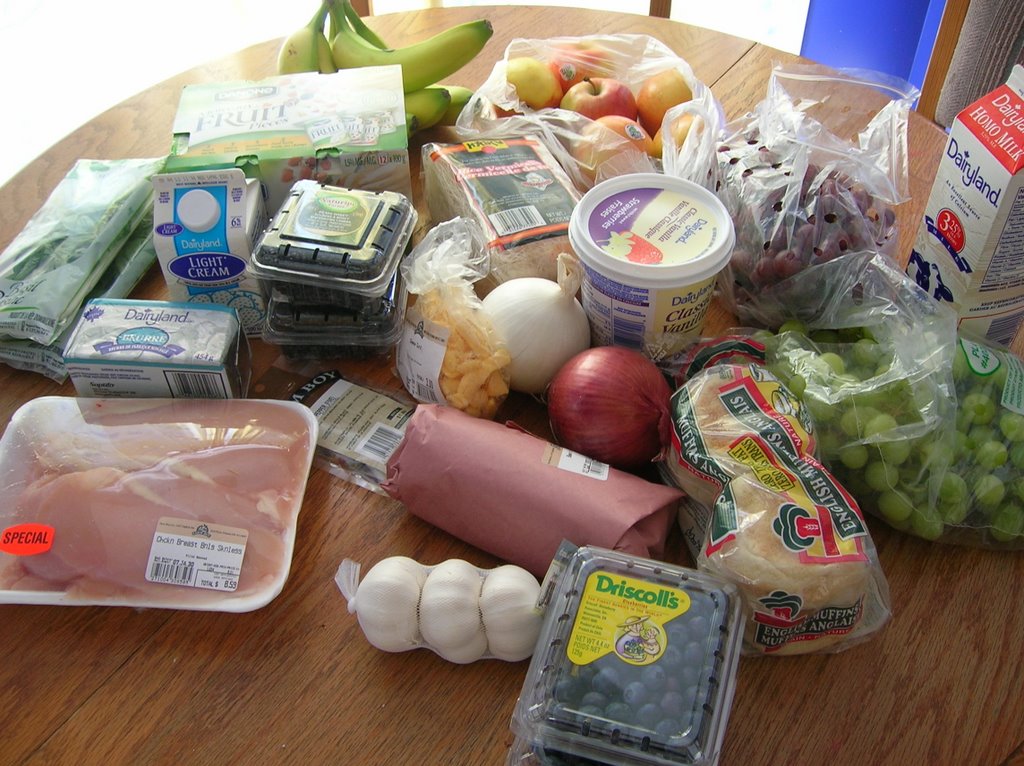
So here is what was in my basket this afternoon, purchased at Farm Boy:

500ml Homo milk - $2.59
Large tub strawberry-vanilla yogurt - $1.99
12 package fruit pieces yogurt - $3.99 (minus $0.75 coupon)
English muffins - $1.29
Lean Beef stew meat - $7.21
500ml Light (6%) cream - $0.99
1lb unsalted butter - $3.99
boneless skinless chicken breast - $8.59
1/2 lb package vermicelli sized rice noodles - $1.49
2 pints blackberries - 2 for $5.00
banana's - $1.24
Royal Gala apples, 6 - $3.20
2 pints blueberries - 2 for $5.00
Red Spanish onion - $0.91
2 packages of fresh basil leaves - $1.49 each
5 peppercorn mix - $1.89
Cheddar cheese curds - $3.10
green seedless grapes - $4.08
red seedless grapes - $4.26
3 package organic garlic - $0.99
White Spanish onion - $1.19

minus bag credit of $0.10

Total spent: $65.12

I could easily have bought more items but was walking home and knew I would have to carry whatever I bought, so I behaved myself. The beauty of this store is that I can go daily and buy fresh as needed. I still need to go to the regular grocery store, get items like cereal and cleaning items (my family goes through massive amounts of hot and cold cereals), but those can wait until later this weekend.

So what's in your basket?

Three cheers for Cream Puff!

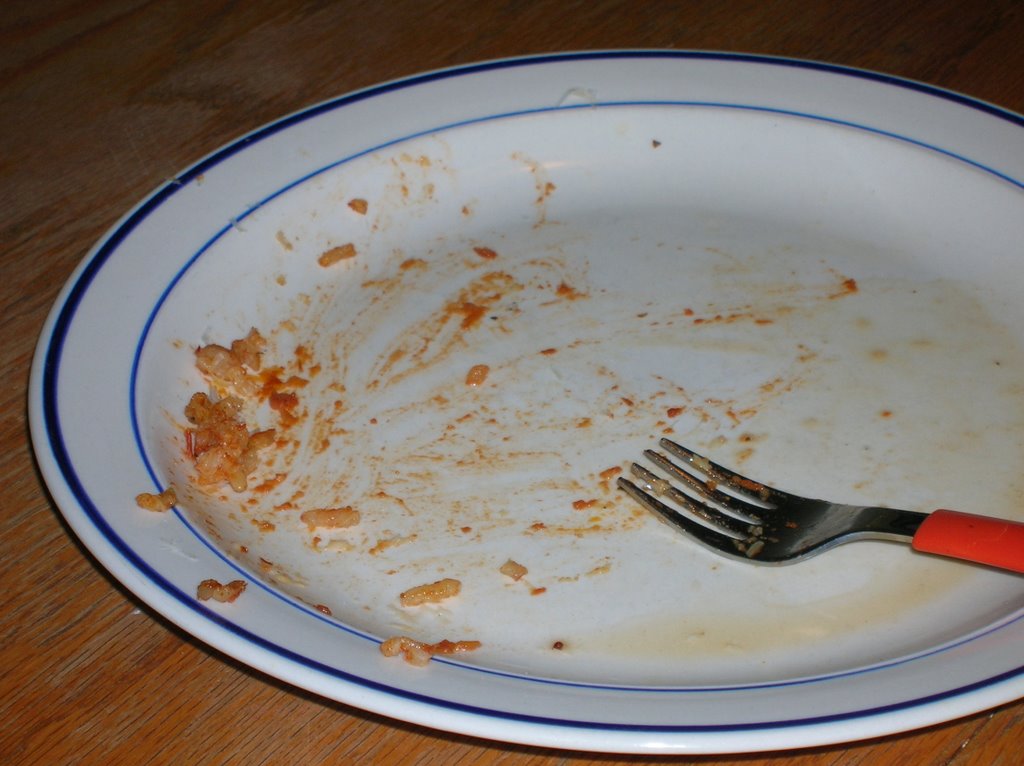
The truest compliment of a recipe. The empty plate of a slightly picky child.

Tonight's plan ahead for dinner involved pan fried pork loin chops, with baked rice and carrots. A little bit of "plain"to go with a little bit of a risk. Okay, with my children, a big risk.

But Ivonne promised me easy to make rice that was creamy, and tasty, and I decided to take her up on it, despite the risk of having a full container of rice for myself to eat.

I'm sorry I did not get a picture of the rice before it was served - I admit, this afternoon hasn't been pleasant with my children and I was not in the mood to listen to one more little voice demand to be fed dinner, so I just dug in and fed them. I knew they would eat the carrots, that is the only guarantee I had for the entire meal. Instead, I ended up with three empty plates, every bit eaten, and compliments on the rice.

In the comments of Cream Puff's post, I mentioned I was going to make a substitution, and I did. I didn't have any Pecorino Romano cheese, but did have a good sized block of Grana Padano which I used instead. I would like to try the recipe again using the proper cheese, but for now I used what I had and it worked out just fine. I also didn't have any fresh parsley but that is okay because adding fresh parsley on top of food is a clear way to get the children to not eat it.

So thank you for the lovely recipe Ivonne! It is a keeper!

Schmecks really does mean good!

So earlier this month I kept seeing blog posts involving the word "schmeck" and they all linked back to Jasmine at Confessions of a Cardamom Addict.

I'd never even heard of Edna Staebler, let alone food that schmecked! What the heck was a schmeck!

Schmeck!

Schmeck!

Schmeck!

Sounds like I'm cursing or crazy!

(Btw, turns out I'm neither, I think.)

Jasmine did a fine job explaining what schmecks is about:

Schmecks is a word that Mennonites use to mean tasty…flavourful…yummy.

Her original event was so popular, she decided to have a repeat event, a part two, and invited all her readers, some of us by personal invitation, to participate and make either an Edna like recipe, if not one of her actual recipes.

Any event that requires I make something yummy sounds like fun to me.

I checked out all the original posts and decided I wanted to cook something new for this event, but I admit, I didn't really want to go out and buy a new cookbook. I haven't even been able to finish reading the pile I have. So I cheated a bit, visited my local bookstore, checked out a book or two and ended up copying out a recipe from More Food that Really Schmecks, Hurry Up Chocolate Cake, as well as Cocoa Fudge Icing.

I picked this recipe because my interest was piqued by the idea of making a chocolate cake in the pan, one that didn't involve cake mix, but was as easy as cake mix. Would it stick to the pan and come out in crumbles instead of nicely cut pieces? Would it have enough chocolate flavor to satisfy my chocolate needs? Would my children eat it, or just eat the icing?

So here are the recipes I copied out:


Hurry Up Chocolate Cake (use a 9x9 cake pan)

1 1/2 cups flour
1 cup sugar
3 rounded tablespoons cocoa
1 tsp baking powder
1 tsp baking soda
1/2 teaspoon salt
1 tsp vanilla
1 tsp vinegar
1/2 cup melted butter or margarine
1 cup lukewarm buttermilk

Sift all the dry ingredients into the pan and stir to blend. Bump pan on the counter to level off. Make 3 hollows in mixture with a spoon. Put vanilla in one hole, vinegar in second hole and melted butter/margarine in 3rd hole.
Pour buttermilk over top. Stir and blend until smooth with no flour showing.
Thump on counter and bake in 350F oven for 30 minutes.

Cocoa Fudge Icing

1 cup sugar, brown or white
1/4 cup cocoa
1/4 cup milk
1/4 cup butter
1/2 tsp vanilla

Combine sugar and cocoa. Stir in milk until smooth. Drop in butter and stir over moderate heat. Boil for 1 minute only.
Remove from heat and cool quickly (cold water in sink.) Stir in vanilla and beat until creamy and thick. It will stay soft - but firm, on cake. (Her words, I didn't really see it though.)

So here is my messy first piece of chocolate cake, with icing. It was very fudgy looking, moist and with a good crumb. Currently my husband is having his second piece, and my youngest child ate his entire piece instead of just the icing.

A cake recipe that only makes a 9x9 pans worth is actually quite practical for a family of four - not too much cake, we won't be eating it for days, but just enough that we will be able to all have some in our lunches tomorrow. It will be a special treat in the kids lunch boxes, a nice way to start off the week.

I am looking forward to other people's submissions to this event, so I can increase my recipe base with more of Edna's quirky recipes.


Vegetable, not vegetarian, chili

I first had this at a friends house for dinner, where the evening started with the question, "Do you like chili?"

The answer was, "No."

Try as I might, I just don't like most beans and legumes. (And, yes, I know that authentic chili doesn't have beans in it, and that kind of chili I do like.)

I like my mom's baked beans, on the rare occasion when she makes them. But I can't stand anything involving kidney beans, even if you pick them out, the flavor lingers and I don't like it.

And I'm probably the least picky of my family, when it comes to beans.

Notice, however, the beans in the picture of this chili? Aren't that many, are there? Now, see all the yummy vegetables?

This chili actually qualifies as a 30 minute meal, start to finish, because it uses a convenience food (or two): canned baked beans in tomato sauce, and white corn and black bean salsa sauce (President's Choice brand.)

So, the recipe:

1 - 1 1/2 pounds lean ground beef
1 onion, chopped (I like red)
1-2 cloves of garlic, minced
1 broccoli, cut into florettes
1/2 cauliflower, cut into bite sized pieces
a bunch of carrots, cut into bite sized pieces
any other vegetable you want in your chili. (I wanted red or yellow pepper but the kids won't eat them, so didn't bother.)
1 jar President's Choice White Corn and Black bean salsa
1 can baked beans in tomato sauce
1 small can tomato paste
sprinkling Italian seasoning, chili powder, salt and pepper

Brown ground beef in a large pot - don't bother draining, you'll want the fat to saute the vegetables. Add chopped onion and carrot pieces, cook a few minutes before adding in the rest of the vegetables and continuing to cook over medium heat. Sprinkle in the spices of your choice. (I didn't have any Italian seasoning and was in too much of a hurry to pull out the basil, oregano, and thyme to make my own, so skipped it - and never noticed the lack of flavor from omitting them.)
Add in jar of salsa, beans and tomato paste. Fill tomato paste can with water and add into the chili. Or for a more grown up version, use red wine instead. Once mixed, turn heat to low, put lid on the pot and let simmer for 10-15 minutes.
Serve with toppings of choice and dippers, see list below. I've marked our required toppings with a *.

Topping suggestions:

shredded cheese*
sour cream*
green onion
cilantro
avacado
garlic bread
tortilla chips

So the next time someone asks me if I like chili, I won't answer no right away. I'll wait to see how many beans are in it first.

I think I have a new go-to quick bread recipe!

I'm falling behind on my reading.

I have a stack of lovely new cookbooks, a brand new novel given to me for Christmas, and piles and piles of magazines around me. And when my new issue of most of those magazines come in - I devour them!

The new Today's Parent was no exception. I've said it before - I love the recipes.

This issue had the winners of the quick breads contest that I had totally failed to notice was happening. How observant am I?

This recipe appealed to me for a few different reasons - it was a quick bread that was appropriate for the kids lunches, I could make it quickly (with help if necessary).

And it didn't involve bananas!

Plus I had all the ingredients on hand to make it, including the strawberries.

To me, that was a sign that this was the recipe I should be making. So I did. Two bowls, quick mix up (took longer to crush the strawberries than it for the entire rest of the recipe.)

And it was so good, that the next morning, there was a small heel of the second loaf left, and that's it!

I did learn one little quirk about this recipe afterwards - the bread lacks its vibrant flavor and texture when it is cold. I learned this when I had a piece for myself as a snack left in the van while I worked. When I came out and had a piece of the bread, it fell flat. Room temperature in the rest of the lunches, there were only crumbs left.

I wonder if the rest of the recipe winners will be nearly as good?


One more for last week


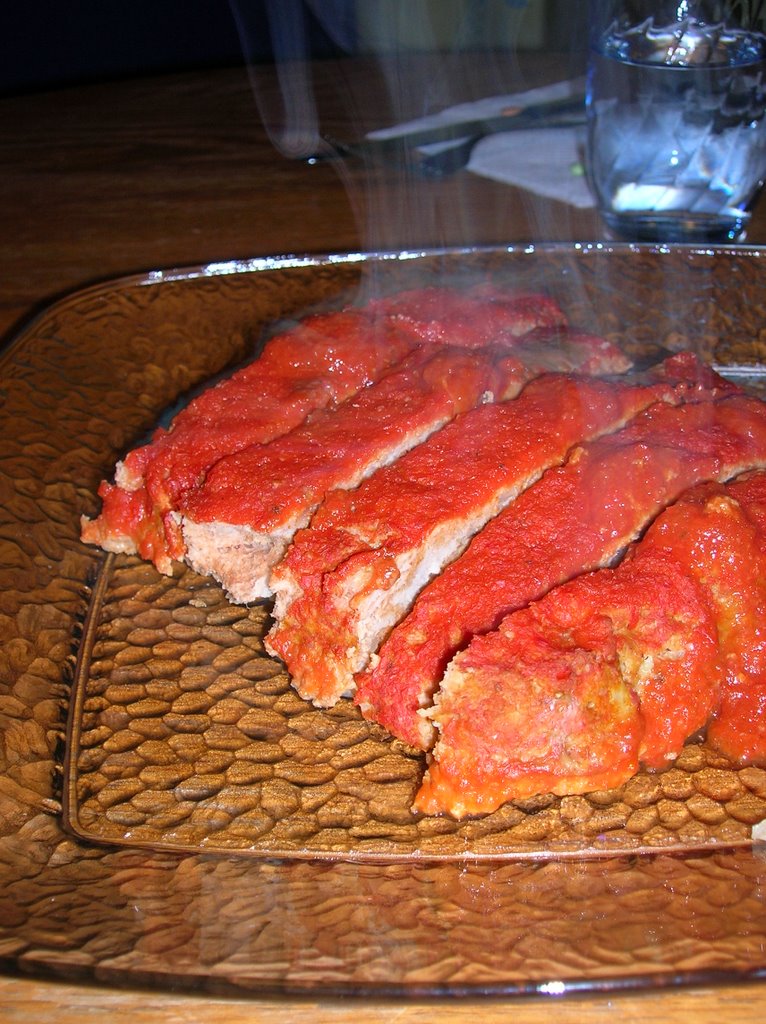
Again I'm late, and again, it is a horrible picture. (I will be really glad when it stops being pitch black at 5pm at night so I can go back to taking some more reasonable pictures!)

Sunday was cold and the end of a very long weekend, filled with company and overnight guests and too much to do. I didn't really want to cook but forced myself to go with my plan ahead of meatloaf and mashed potatoes. Homey and with lots of left overs.

My recipe of choice for the meatloaf came from The Food Network and a show I had seen a few weeks back, Good Deal with Dave Lieberman. In it he made three make ahead meals that were easy on the budget and allowed for lots of left overs for a busy week. Just what we'd had and just what we needed.

I specifically wanted the turkey meatloaf recipe as I hadn't made any kind of meatloaf for awhile and hadn't used a specific recipe for any of those. Mostly meatloaf is a recipe I tend to just do by the seat of my pants. Or the contents of my fridge and pantry.

I was a little leary about trying a red pepper sauce after the fiasco that was red pepper pasta sauce a few months back but decided that since it wasn't going to be the feature flavor, I could risk it. And as luck would have it, my local grocery store actually had ground turkey in (doesn't happen that often) and specially packaged up the amount I wanted.

This was a good choice. It came together quickly, smelled lovely while baking (even my husband complimented the smell of dinner cooking) and was enjoyed all around. (One exception - oldest son was sick so picked at his veggies but chose to go to bed early instead. I find it amusing that my children tend to eat their veggies first at dinner time.) Left overs the next day were also quite good - the meatloaf had a bit of a warm kick to it, from the cayenne pepper in it.

So total new recipes (from actual books/magazines) is well above my required one.

Wonder if I can keep that up?

A weekly round-up of recipes

I actually did alot of cooking this week, and surpassed my minimum of 1 new recipe for the week fairly early.

I also broke one of my own "guildlines" - finish reading a new cookbook before you start cooking from it. Which is why no one has seen recipes form me from The Vegan Lunch Box, or either of the ACES Bakery cookbooks. I'm still reading them.

So early in the week I had the hankering (funny word, I know, I just like it right now,) to roast a chicken. It was something I could prep in advance and put into the oven before I go do the 45 minute-plus drive to pick up the husband from work on the days I have the van. I've done a few roasted chickens lately, always involving a brine and garlic, but haven't really been satisfied with the results. Having to take the time to prep the chicken a full day before for brining should yield good results, and maybe it's just been my roasting, but I haven't been happy.

So I went net searching for a different type of roast chicken, something that didn't require alot of advanced work and found this. The combination of the basil, oregano, cayenne and paprika intrigued me, as they aren't four flavors I would have thought to put together for chicken. But it had all my requirements so into a bowl they went, out came the oil and the chicken, and into the oven it went.

Then promptly into our stomachs afterwards!

It smelled good, it looked good and mmmmmm it tasted good!

A new recipe to add to my expanding blue book of tried and true recipes.

Friday I had company coming, my grandparents, whom I don't get to cook for often. I had "comforting and elegant" in my head and for some reason felt that meant soup, homemade soup, with good sandwiches. And since my grandfather was involved, there had to be dessert as well.

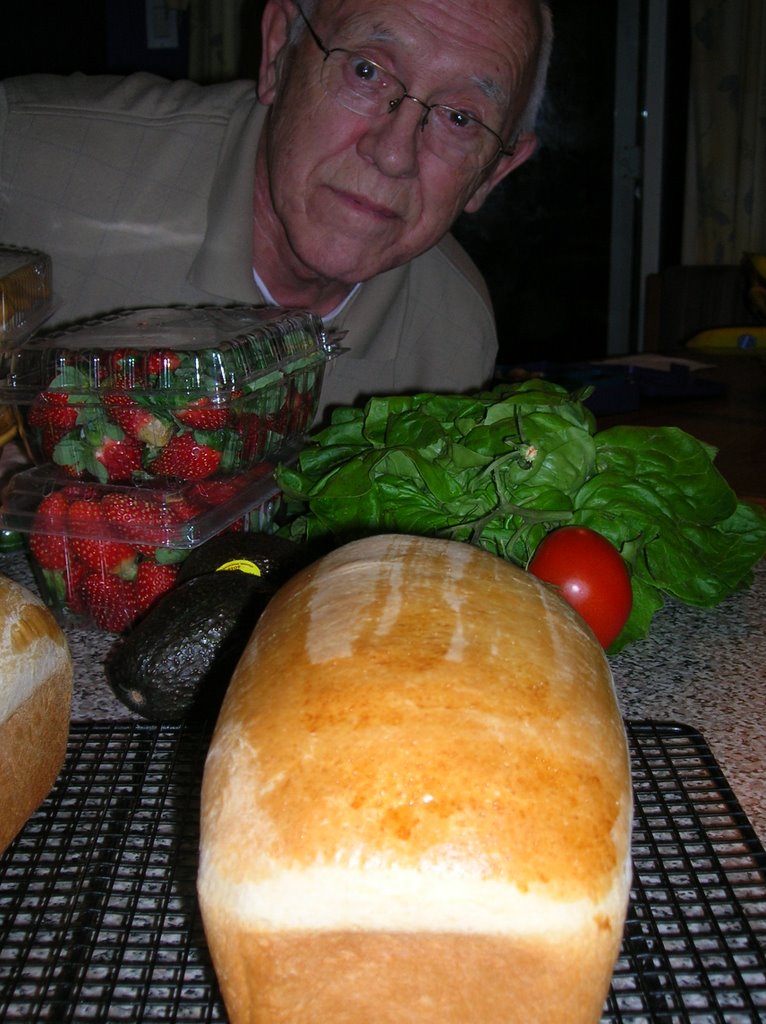
I didn't want just any kind of sandwiches but something a bit special - I ended up deciding on California BLT's, which I found in my new Ina Garten cookbook, Barefoot Contessa At Home. When asked by friends what I was making, the California portion caused confusion, so to ease that "huh?" factor, the difference is avocado slices added in with good, crisp bacon, fresh, ripe tomatoes, buttery lettuce and a sprinkling of salt and pepper, a smear of mayo. And to up them up in special quality, I made bread, honey white bread, also from the same cookbook.

This bread worked perfectly to the recipe and was so well received that I've just pulled out a new batch from the oven. My children loved it both with a bit of butter and toasted with jam. And it was just what I needed to make my sandwiches have that special touch.

Btw, the second picture of the bread, before I sliced it, is being admired by my grandfather.

Okay, really he's just being silly, but then if he weren't being silly, we would wonder what was wrong!

My last item for dinner was the soup, and again I knew where I wanted to go with it. I wanted roasted cauliflower soup, topped with some sharp, shredded cheese. And I could not find a recipe that was specifically for roasted cauliflower.

So I winged it.

I roasted up a head of cauliflower pieces with some chunks of onion, roasted in olive oil, salt and pepper. Then I added them into some chicken stock, more salt and pepper, a sprinkling of cumin and a few sprigs of fresh thyme. I also added in the flesh of a baked potato, for thickening. Then I pureed it all together, added a bit more salt and pepper, and some pieces of a sharp white cheddar. Each bowl was served with additional cheese sprinkled on top.

This soup did not look good at all. The picture is terrible, I could not find some good light to take one, but even before I took one, it looks icky. And was an excellent example of don't judge by looks. It was amazingly good, even better two days later (I had the leftovers for lunch yesterday.)

My final effort of the day was homemade vanilla ice cream. Sorry, no pictures, so you will have to simply imagine the flecks of vanilla beans generously floating through the thick, creamy ice cream. It went very well with the apple pie my grandmother had brought, baked up by me.

My only other effort that weekend was to make some muffins for breakfast with my 4 year old. My grandmother had cleaned up her fruit bowl by bringing everything to me, which meant over ripe bananas. So we remade the chocolate banana bread, in muffin form, and fancied them up a bit more using chunks of banana chips, broken up by the assistant chef. (Oh, one thing I failed to mention with the original post about the bread. I don't use nuts in my baking, so did not add them.)

Hopefully I will be able to post more often, by recipe instead of by week, but work has been keeping me busy. I'll figure it out eventually.

Sorry about the horrid picture

It was late in the day, no light, and I had to take a picture before this was devoured by the children!

So my neighbor had a baby last week, her forth boy. What do you give as a shower gift to someone who has four boys? And her baby shower was scheduled at the same time as the husband's birthday party, so I couldn't do more than drop in for a few minutes. (And for the record, my shower gift was a gift certificate to Build-a-Bear so they could make a stuffed bear for him.)

We jokingly laughed about the cake party I was hosting, and how I would try to bring her some of the left over cakes, which she loved the idea of!

No suck luck. The really, really good stuff (read that as cheesecake) was eaten right away.

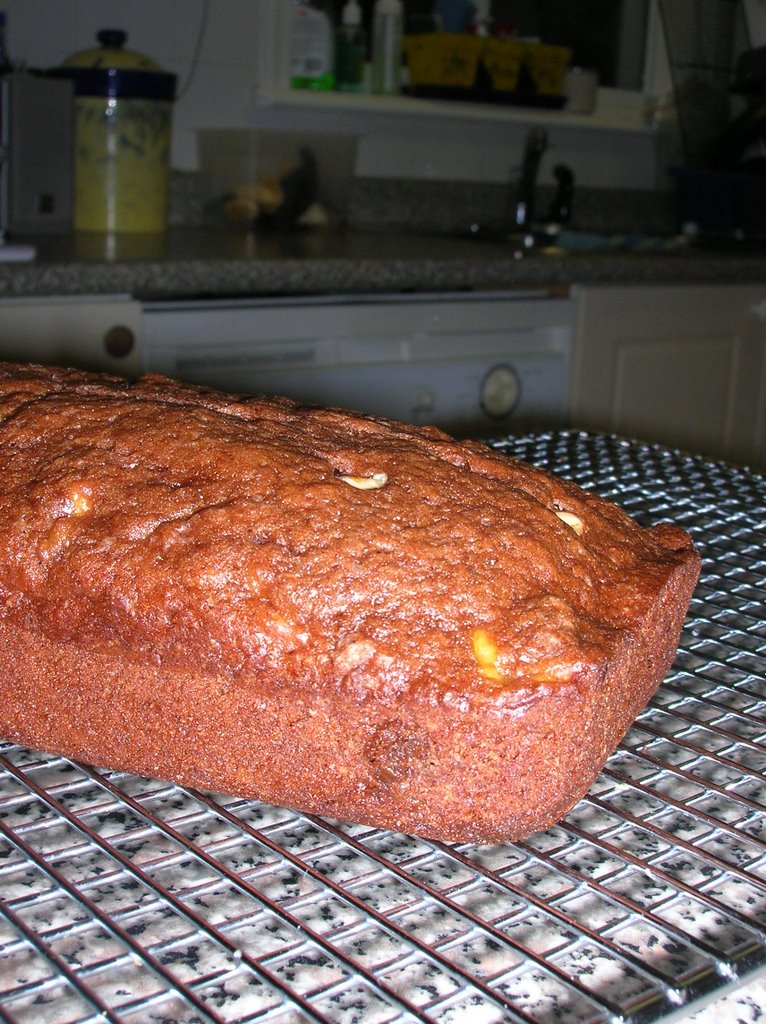
So instead I made her some banana bread, but not your normal, everyday banana bread. Having a forth child deserves something a little more special than my standard banana bread!

How about chocolate banana bread, loaded with white chocolate chips?

Now that is a bit more like it!

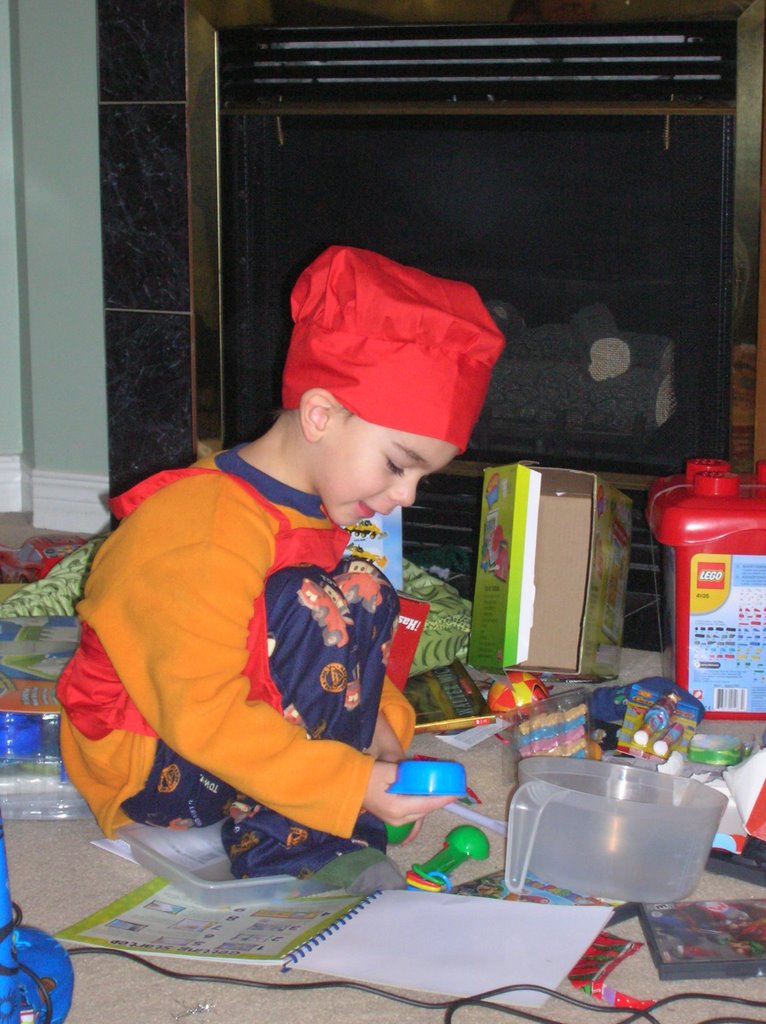
And as it happens, I had just found a recipe for chocolate banana bread at Joy of Baking. Plus this let me fulfill my requirement of at least one new recipe a week, and it gave me something I could bake with the 4 year old chef-in-training. (We even had to use his new bowl, measuring cups and spoons, those that Santa brought him - couldn't find his little hat or apron though.)

This bread came together quickly, as most banana breads do, and was just special and different enough to be a lovely change from the norm. The chocolate was deep, though not intense, and a bit surprising since it was only cocoa powder. The white chocolate chips added a touch of texture, despite not being overly obvious.

I will make this recipe again, anytime I feel like a change, or want something special.

And maybe next time I'll get to use my own bowls and measuring spoons.

How to celebrate a birthday

"Mommy, I'm having my birthday soon. Tomorrow."

"No you aren't, your birthday isn't for a long time."

"How many sleeps?"

"Alot, over 300."

"We'll who is going to have a birthday then?"

"In our house, Daddy is next."

"He's going to have a party. We can invite all my friends. And they can all bring a cake." (note who's friends he plans to invite?)

"A cake?"

"Yes, it will be a cake party. Everyone has to bring a cake for Daddy."

Don't ask why, but we went with this idea. All the girls thought it was a hilarious idea for a party, while my husband, "Daddy", said, "Um, I'm in training right now."

Yes, we ignored him. :-)

Normally he requests black forest cake for his birthday. This year was a bit different: he asked for something involving chocolate and orange, but left the rest of the details up to me.

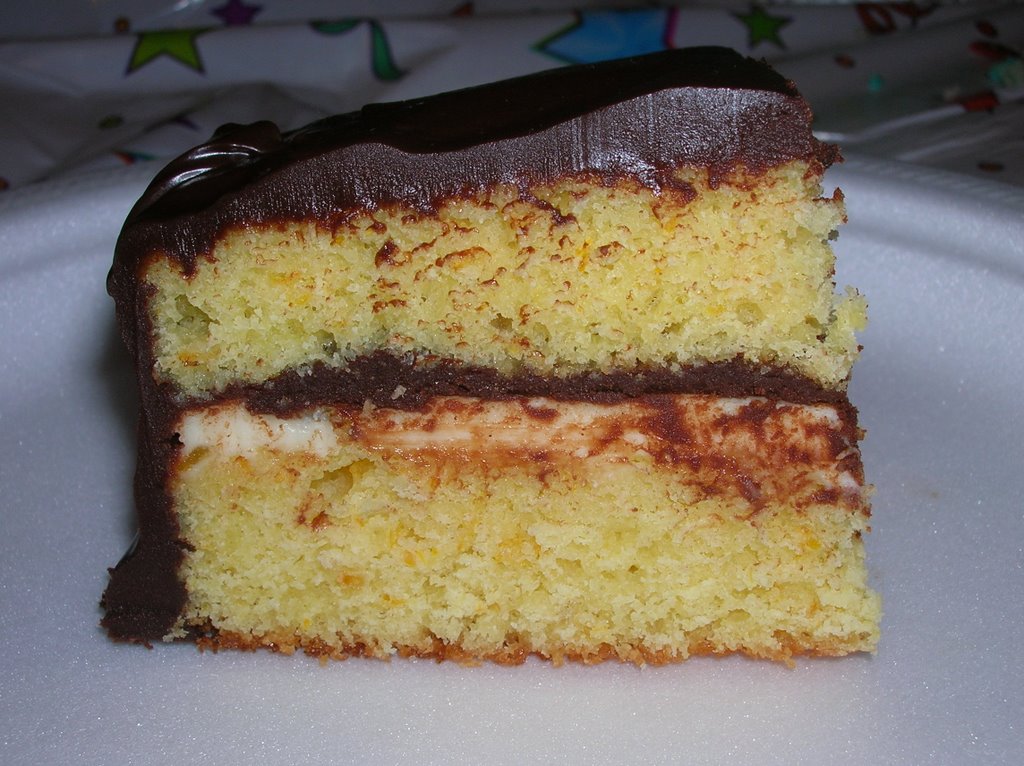
I settled on this: Decadent Chocolate Orange Cake.

I have to admit, I didn't like this cake. But I also am not a person who really likes chocolate and orange together, despite it being a classic combination which is supposed to marry so well together. Sorry, I just don't go crazy for it the way some people do.

And the name of the cake is very deceiving. It isn't a chocolate orange cake, it is an orange cake with a chocolate ganache. The orange in the cake comes from the rind of two oranges (I zested mine straight into the sugar instead of peeling, chopping, then adding to the sugar to puree) as well as orange marmalade both in the cake and in the filling. The filling itself is simply cream cheese, marmalade and a bit of sugar, which is then given a coating of the chocolate ganache.

I made one other change to this - I didn't use the pans specified, but instead used the square silicone pans I was given for Christmas. It meant I could not split the cakes in half to make four layers (the cakes baked up very lopsided and only careful work on my part resulted in a square cake that was not completely off balance,) but allowed me to have a nice square cake.

In the end, we had 6 cakes: my chocolate/orange cake, a banana chocolate chip cake, a triple chocolate torte (I need the recipe for this one), a lemon cake from a local bakery that I so want to visit, a black forest cheesecake and a caramel chocolate brownie cheesecake (which was so rich I actually could not eat it!)

Yes, there was alot of cake! And alot of giggling over the idea of a cake party. One has been requested by another adult for their birthday later this spring, and one adult as asked for a variation - a cookie party!

So the next time you are looking for a different idea for a celebration, ask a 4 year old what kind of party he thinks you should have. Just don't let him compile the guest list. :-)

Birthday smoothie, and the new year

Today is the husbands birthday, so we started the day out early (it is only 9am now) with some cooking and not cooking. The cooking part involves a large pot of homemade tomato sauce simmering on my stove, for use later today when I make some lasagna for the dinner party we are having (more about that fun event later!)
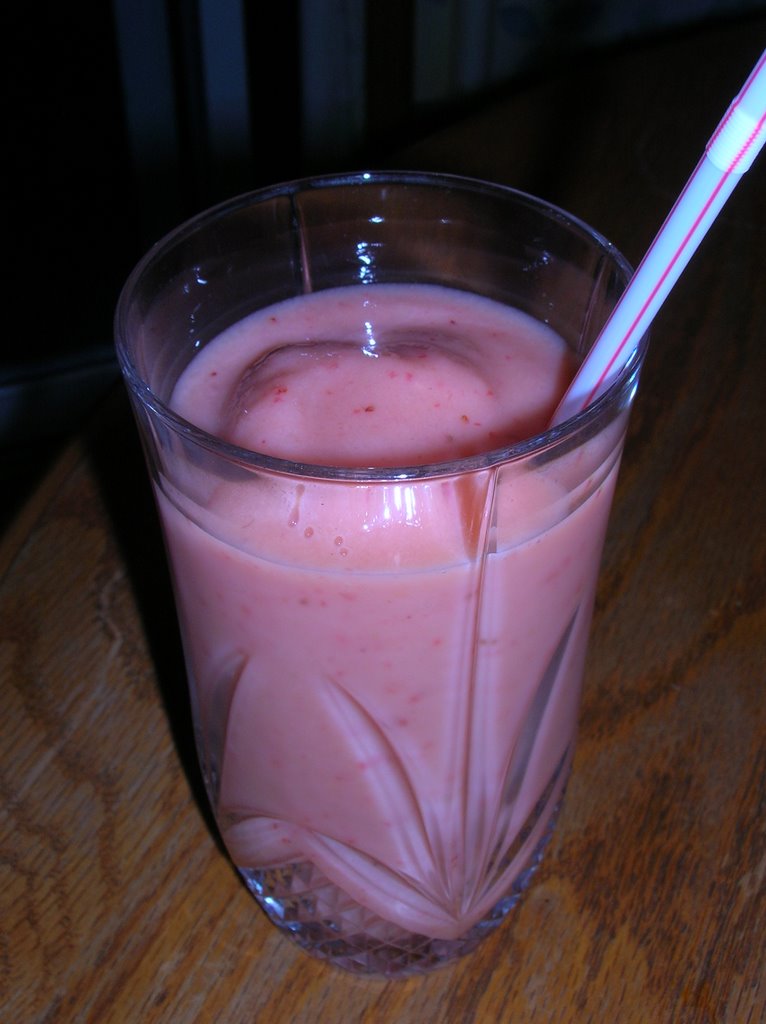
The non-cooking is just as tasty as homemade sauce though - fruit smoothies! Just the thing to fuel a runner pre-morning run, and just a bit special for his birthday!

I didn't plan in advance to make this for him, so what went into it was made up of what I had on hand, which was fortunately a good variety. Frozen strawberries and pineapple joined a ripe banana, pureed together with orange juice (which I was just about out of) and orange, raspberry, passionfruit juice. A scoop of vanilla frozen yogurt was added for a touch of creaminess and decadence! Yummy! It was so good!
By the way....

Belated Happy New Years!

Yes, I know I'm almost a week late! I've been busy with kids, clean up, going back to work (a week before school starts, so bringing kids with me.) Cooking almost every day but nothing new, nothing fancy again. Even today's lasagna is nothing new.

Despair not! New recipes are coming! I have all kinds of lovely new cookbooks to read, recipes in my "to try" pile are growing faster than the weeds in spring and I have a resolution to back up that long, long list!

Resolution you say? At New Years! How surprising! (hehehe)

1. No arrowroot cookies for me! (This is work related - we provide the children with a snack of apple juice and arrowroot cookies - and usually have lots left over for the parent volunteers and staff to munch on. These cookies are like chips - bet ya can't eat just one!)

2. No eating after 8pm, parties excepted. Or late night dates with the husband.

3. You will make one new recipe per week, minimum! Try new things, even if it is something made that only I will eat for my lunch, try some new things!

No the smoothie was not my new recipe for the week. Actually I made my recipe yesterday, a birthday cake that needed to set up over night. Haven't taken pictures of it yet, though I will do so at the party this evening, so will post about it either later tonight or tomorrow.

For now, live vicariously through us - enjoy the sight, though not the taste (sorry!) of the smoothie, and keep thoughts of chocolate and orange in mind.