So I've been stuck at home for the last week. A full week now actually.
First it was chicken pox with my youngest son. His first spot showed up on Monday night.
Then Sunday had my oldest waking up with a high fever that he's still battling, three days later.
Sick kids don't generate as much laundry as healthy ones (most times), and Mom's not leaving the house to go anywhere also don't generate much laundry. So I've had lots of time to get some baking in, though sporadically and in short bursts.
When not with a child, what better way to pass the time (and try and keep my brain functioning) than to bake? So bake I did!
Tuesday had me in a chocolate mood. I must have been gearing up for the chocolate intensity cake that I would make Wednesday/Thursday.
I started out with Dorie's recipe for Midnight Crackles, found on page 74, which I'm sorry to say that I do not like. Which isn't to say is a bad cookie - my 8 year old moaned about how good and chocolatey these were. My husband found them a bit too chocolatey also, but that didn't stop him from putting them in his lunch. It seems to be just me who doesn't like them. I find them too strong in chocolate flavor, nor do I like the texture.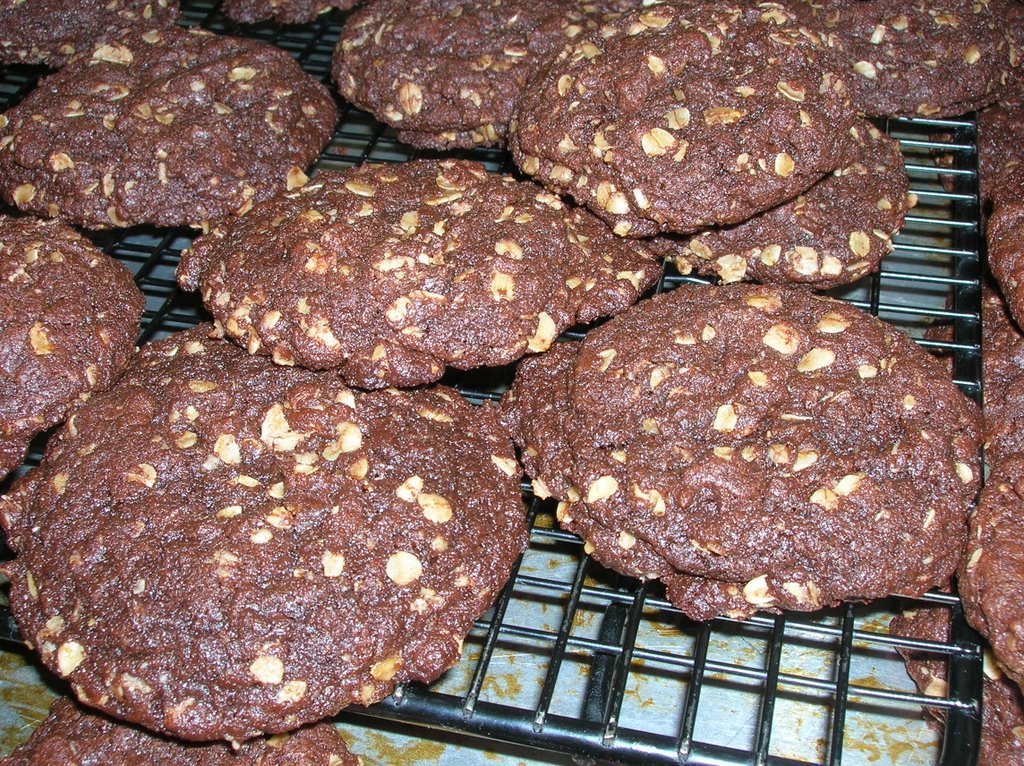 But since I was on a chocolate fixation, as well as cookie baking for the lunchboxes/freezer, I also made the Chocolate Oatmeal Drops on page 75. Again another very chocolatey cookie that didn't grab me, though I much prefer these to the Crackles. These were very brownie like, with a bit of an unusual texture from the oatmeal, and again were loved by my children.
One thing I learned from these cookies - I don't know how Dorie manages to get her yields! Each recipe says it makes about 50 cookies. I got about 30ish from both. Using a measuring scoop. Oh well.
Another note for each cookie. For the crackles, I found they worked better if I "smushed" the cookie some in my hand before putting it down on the sheet, rather than rolling it in a ball then pressing down lightly with my finger tips. Flattening them more changed the texture slightly, to one I preffered. And with the oatmeal drops, the cookies spread better on parchment rather than a silpat (I only have one of those, so I use a combination of the two.) To me this was important because I much preferred the thinner cookies over the smaller, denser cookies. I guess I just like less dense, flatter cookies.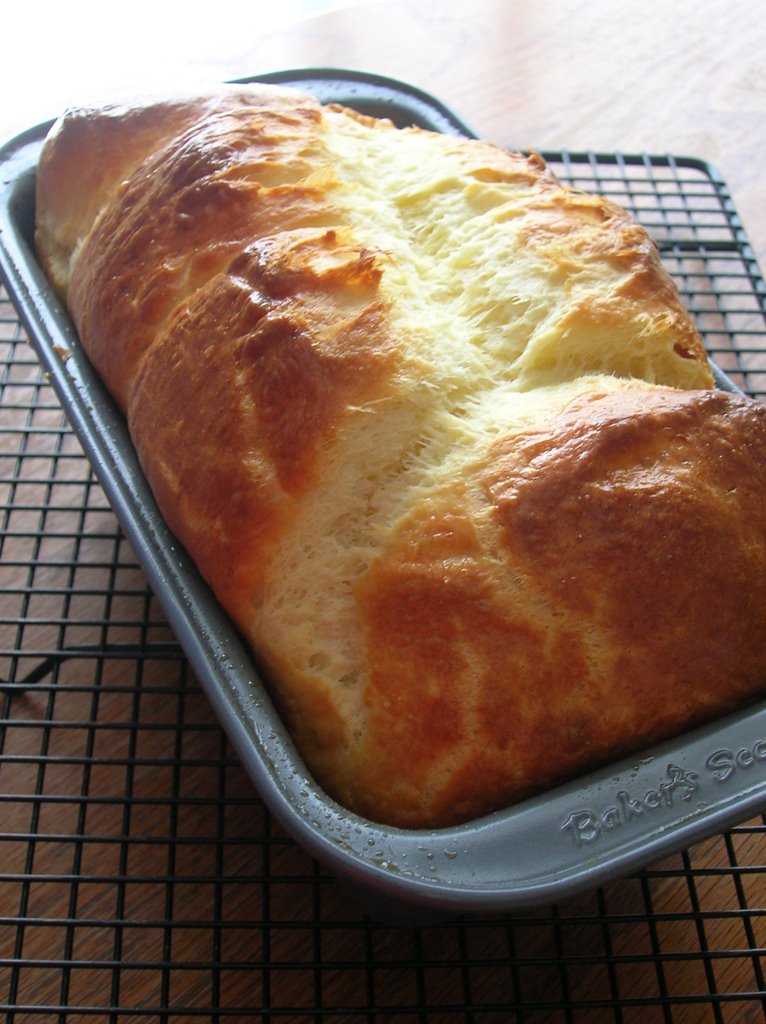 After the chocolate overload that was these cookies and the cake, I decided to go on a different bent with baking and got brave. I decided to make brioche.
I had been drolling over the recipe for Golden Brioche Loaves (page 48) for awhile, mostly so I could make the Pecan Honey Sticky Buns, minus the pecans, (page 51.) I like sticky, cinnamon buns. However the recipe for the brioche and the buns basically requires two days. One to make the dough and let it rise, then the second to shape, rise and bake the bread/buns.
After making croissants over 3 days, however, a 2 day bread recipe seemed almost easy! So Saturday night I got baking.
Please don't ask why I waited until Saturday night to start baking bread. I don't know.
Whatever my reason, at 6pm on a Saturday night, I was standing next to my mixer making sure it wasn't going to blow up or fly off the counter. Poor Bob got very warm that night, mixing in the 3 sticks of butter into the dough.
One thing I can say about Dorie - when that woman says 2 hours rising time, she really means it! I doubted her, I admit it. After 4 30 minute rising periods in the fridge, where the dough kept growing and growing, I expected it to keep going. But sure enough, 2 hours of rising and that was it. It just stopped.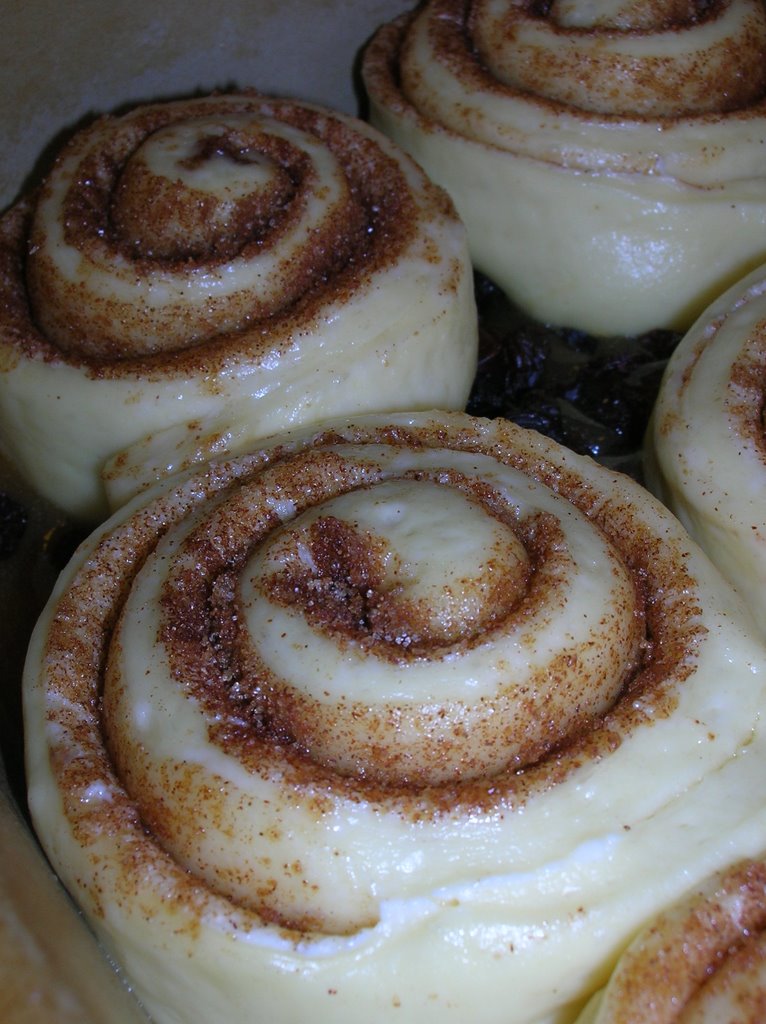 Sunday morning had me up early, a different sick child this time, making bread and buns from that dough. I was so fascinated by the dough that I had to make half of it into a loaf, and since I would only need half the dough for the buns, it was obviously fate!
No problems making either of the recipes. They are clear and precise (except that 4 pieces of dough crosswise on the bread part, but the picture helps figure it out.) In about 30 minutes I had a loaf pan filled with dough rising, and a pan of cinnamon sticky buns (raisins, not pecans though) rising as well.
I think I made one little error. I didn't use pyrex - my pyrex dish is 8 1/2 x 11, not 9 x 13, so I decided to use one of my stoneware dishes instead. As a result, my buns never did get the dark color that Dorie's do.
Color aside - lets get on with the important part: The taste!
Brioche as a plain piece of bread = a plain piece of bread. Brioche as toast = oh my this is really good toast! A bit of butter, a smear of jam (raspberry is what we had) is oh so good. It is what I would call special occasion toast. Having a bridal shower brunch? Make brioche for the toast! Anniversary breakfast in bed? Get up really, really early and make brioche toast.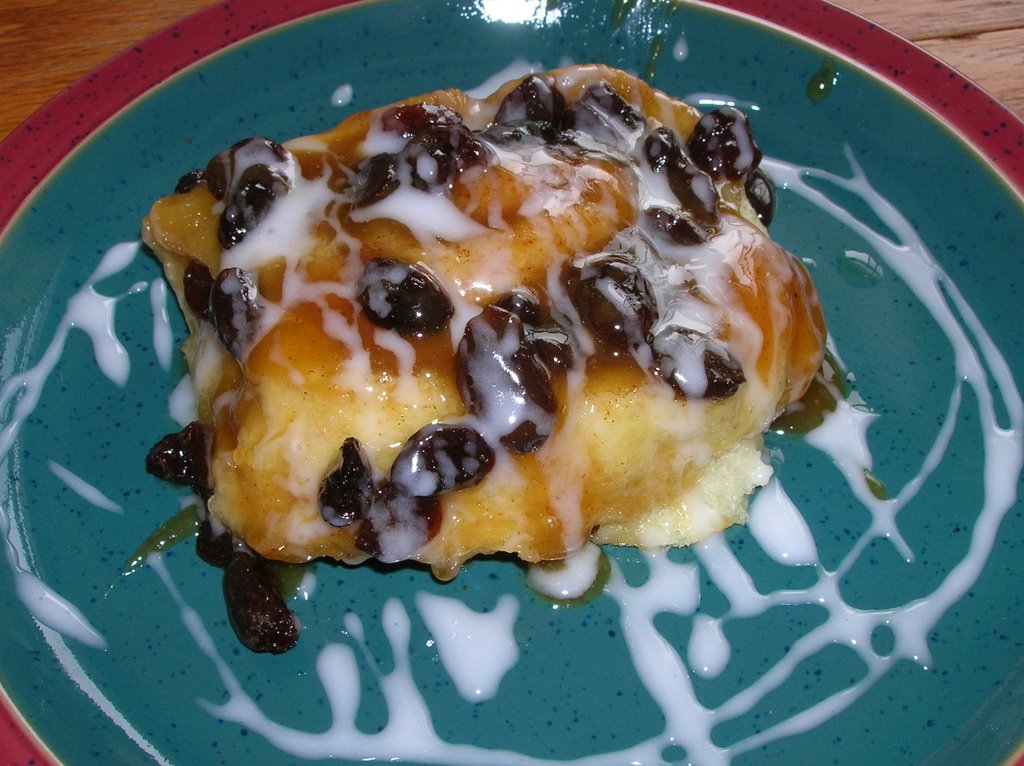 The same could be said about the sticky buns. These are sweeeeeeet! Ooey gooey sweet. Icing glaze not required at all, but if you want to make them look a bit prettier.... My husband speculated that you really almost need the pecans for texture with these buns, as they are soft, and sweet. Raisins, as good an addition as they are, don't provide any crunch and have a similar soft texture. These are the kinds of buns you would want to make if you were hosting your boss for breakfast. Or your future mother-in-law.
Unfortunately the brioche part seems to get lost in the glaze, a combination of honey, brown sugar, butter and cinnamon. (Okay, I added a sprinkle of nutmeg, I couldn't help myself!)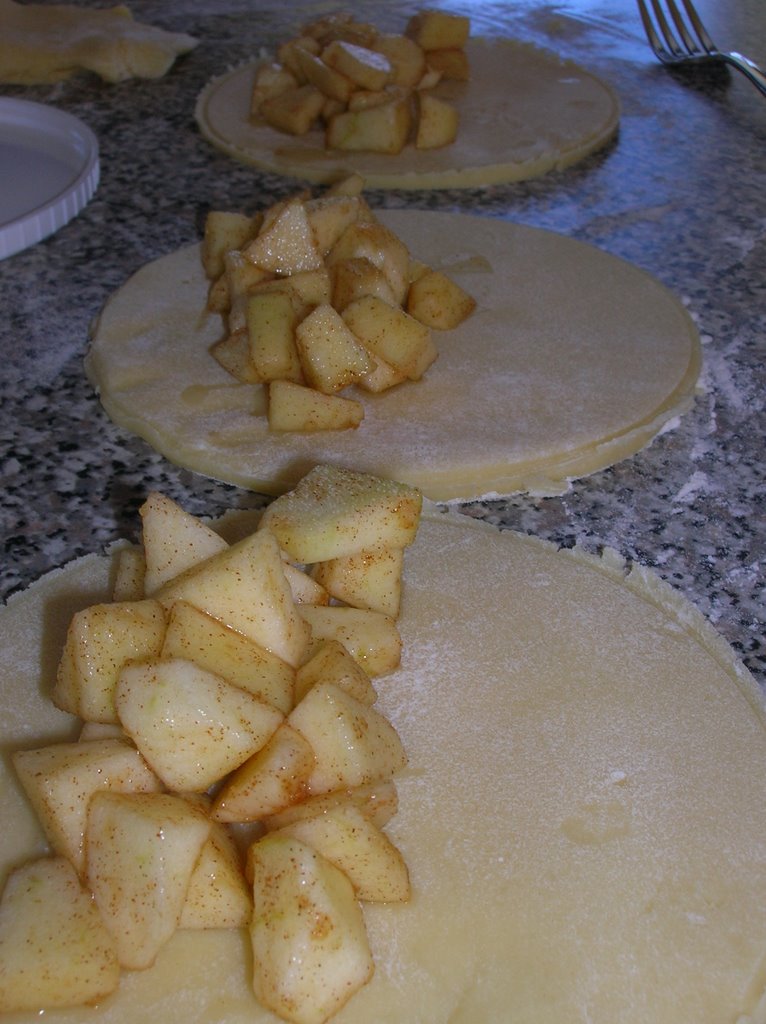 Still, if I was in the mood for something decadent for breakfast, and had lots of patience, these are a good place to start. We ended up eating them for a very, very late breakfast, almost lunch, so get up early if you want them for breakfast! If you aren't so patient, well, I have another recipe for cinnamon sticky buns that comes together much quicker (10 minutes) and makes almost as good a breakfast treat.
You'd think after 4 Dorie recipes for one week I would be done. Well I wasn't. I still had one more I wanted to make. Or rather, I wanted to make the "Playing Around" recipe instead of the original, Russian Grandmothers' Apple Pie-Cake (page 310). I wanted turnovers (page 311.)
I went with Dorie's suggestion of Golden Delicious apples, but cut way, way too many. She doesn't suggest a smaller amount for the turn overs, and even though I only peeled, cored and diced 6 of the 10 apples, I still had apples to spare. Fortunately they were apples one of the children was happy to sit down and eat out of a bowl with a spoon. He even complimented me on how good the apples were.
I don't own a 4 1/2-5 inch cookie cutter, so improvised and used the lid to a small bucket of popcorn, cutting around the lid with a small knife. It ended up being just about the perfect size for making turnovers and I must remember to put it in with my cookie cutters for the next time I make them. I will be making turnovers again, they were fun and great for snacks and lunches, though I will make other recipes before I return to this one. This recipe was good, I very much enjoyed how easy the dough was to work with, and how the crust was cookie like, but I would like to expand and try something a bit different next time.
And next time I will pay more attention to the time and smells from my kitchen. I had set my timer for 18 minutes, though the recipe called for 20 minutes, but didn't check it when I started smelling the crust. So I slightly overcooked the first three turnovers, though only on the outside edges of the crust. The rest, with my being more aware, turned out a lovely golden color.
On second though, I think I will make this crust again soon - and this time use raspberry jam instead of apples. Or blueberry jam. Oooh, never mind the jam, just blueberries.
Alot of baking for one week (with a few savory recipes as well, not mentioned here), but a productive way to spend some time while home with sick kids.
I'm falling behind again - so here is a weeks worth of Dorie baking
Chocolate!
Well we are at it again!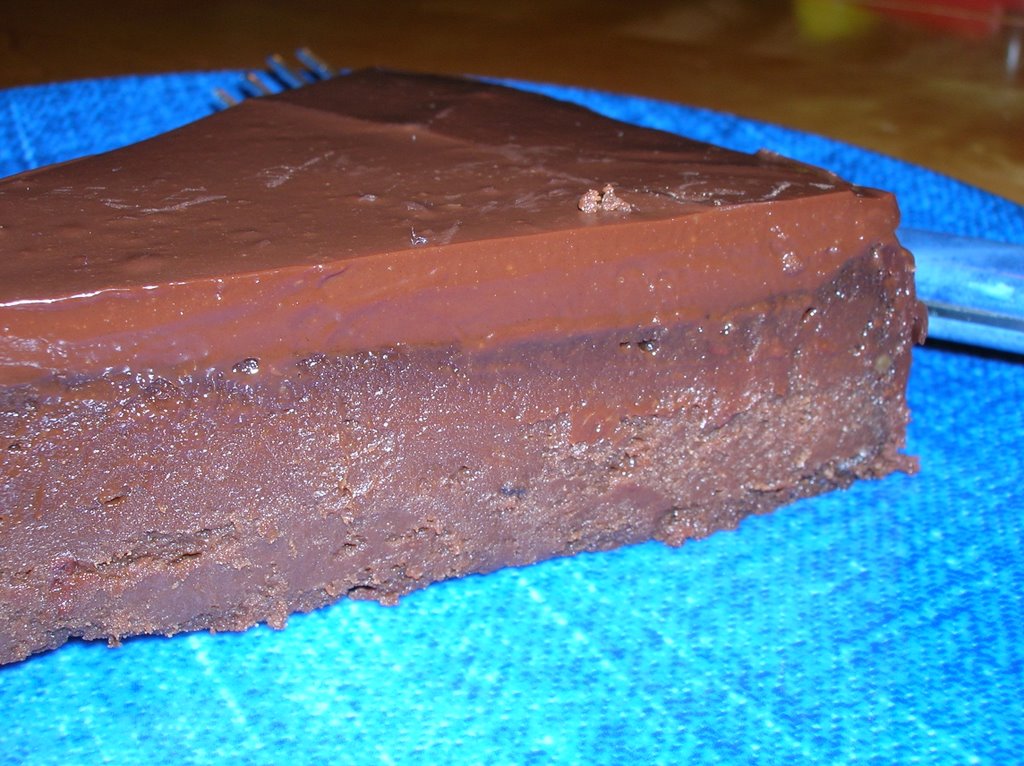
After the various successes in making croissants, we crazy blogging baking ladies are at it again! We can't seem to figure on a name, but we all agree that those who bake together, bake!
And who is baking? There are ten of us now:
Ivonne: Cream Puffs in Venice
Lisa: La Mia Cucina
Peabody: Culinary Concoctions by Peabody
Helene: Tartelette
Brilynn: Jumbo Empanadas
Veronica: Veronica's Test Kitchen
Tanna: My Kitchen In Half Cups
Hester: Hester in Geneva
Mary: Alpineberry
However, after the challenge of last months croissants, it was agreed upon that something much simpler (but not less tasty) be chosen for this months assignment. After a few joke suggestions (peanut butter sandwiches, microwave popcorn!) we finally agreed upon a flour-less chocolate cake, the recipe Chocolate Intensity from Tish Boyle's The Cake Book (which hopefully will be arriving at my door any time now! Oooh I can't wait!) (Note - when I said any time now, I didn't mean literally, however while writing this, my books were delivered!)
 The recipe for this cake uses only a few quality ingredients - lots of bittersweet chocolate,butter, sugar, eggs, vanilla, salt and coffee, a traditional flavor partner with chocolate. One I am not fond of at all. Rather ironic that one of the standard flavors that enhances chocolate, one of my favorite flavors, is one that I don't like at all. (I guess that is another one of those odd food facts about me.)
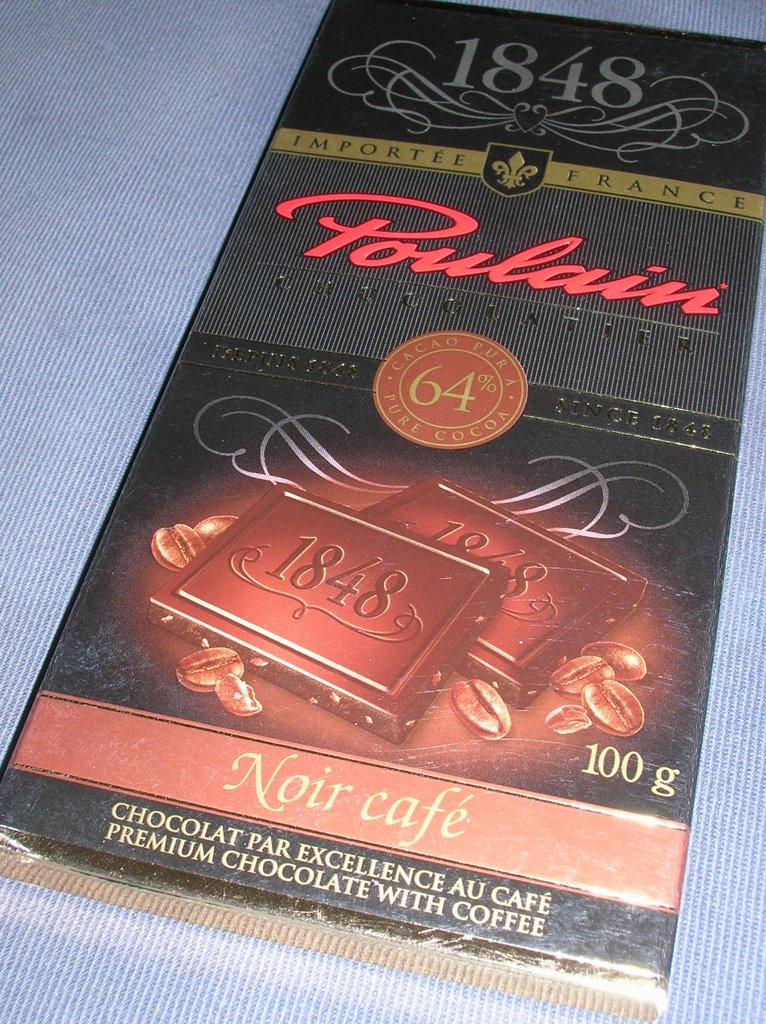
Here's another little oddity - when searching recently for chocolate, I ended up inadvertently buying two bars of 64% chocolate with coffee. The recipe called for 62% chocolate, which I never found anywhere, so used this coffee chocolate, along with an additional ounce of a 70% bittersweet chocolate. Despite this additional flavor, and my dislike of coffee, I still added in the 1/2 cup of coffee. It was a weaker, instant coffee, but I still used it!
I'd never made a flour-less cake before (that I can remember.) I've read enough recipes to know that this recipe was a bit unique. It didn't involve whipping egg whites, or folding. Or tempering. And I can tell you, that lack of tempering the hot chocolate mixture into the whisked eggs made me nervous!
Some of the other ladies had already completed their cakes by this time, and no one had complained of pieces of cooked egg in their finished product, though, so I held faith in them (more so than the cookbook author) and whisked those eggs into the hot mixture (a combination of the chocolate, butter, sugar and coffee.) And you know what? It worked!
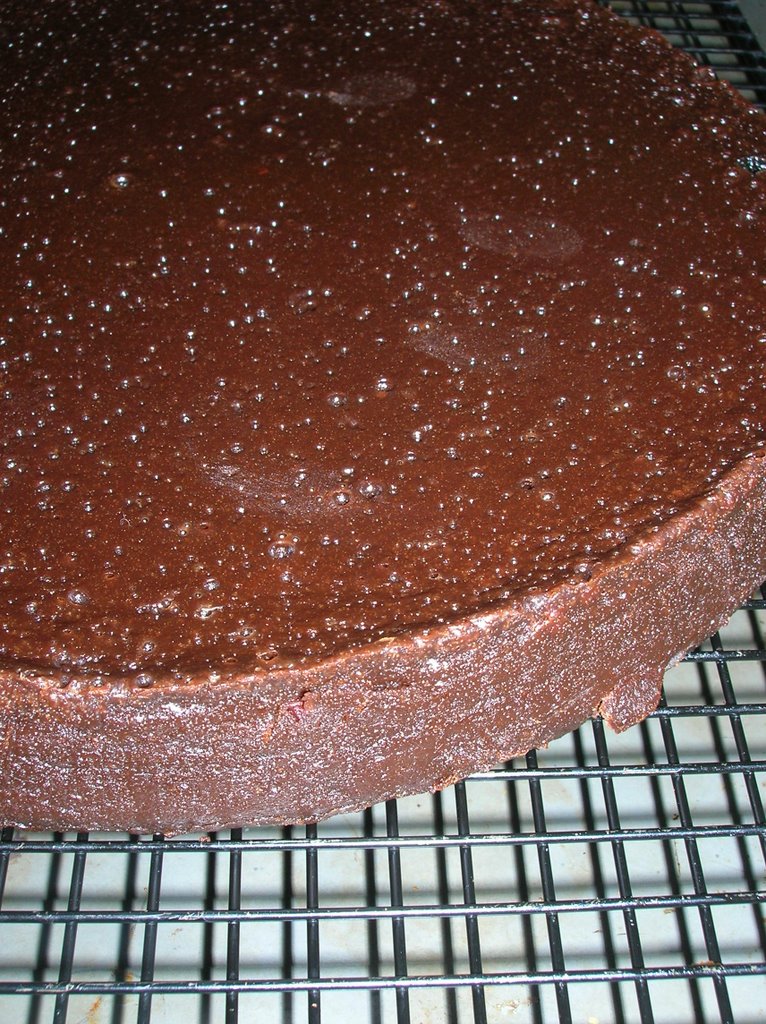
I don't own a 9 inch cake pan (yet) so used my springform pan, sealed tightly in foil before being placed in the waterbath. I still had a bit of leakage, but not much. My cake did not rise, as a cake involving whipped egg whites would, but instead seemed to be dense and fudge-like. It had small bubbles on the surface. Those bubbles were still there even after chilling.
To finish off this cake required a glaze. Not a sugar glaze, but a chocolate one of course! This is a chocolate intensity cake, so what else but more chocolate would do? So more chocolate was chopped and melted, this time with heavy cream and a touch of vanilla, before it was poured over the cold cake.
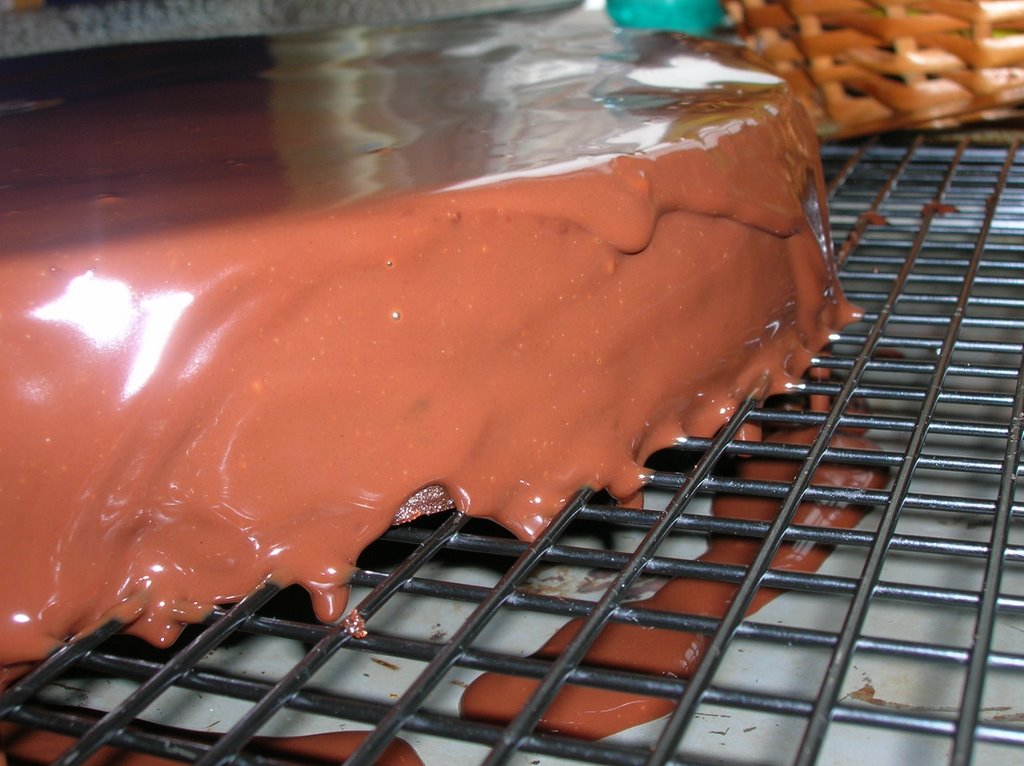 Smooth, smooth, smooth. Pour more chocolate. Smooth, smooth, smooth, pour more chocolate. Repeat until out of chocolate.
Now that's alot of chocolate!
Coffee not being a favorite in my house, I brought my cake out for "coffee night" with my girl friends, where coffee is enjoyed and savored. And chocolate is worshiped.
Tish describes this cake as similar to a creamy truffle, but fudgier. She's not wrong. This cake is both dense and light, which seems contradictory but isn't. The flavor is huge, the texture is dense, but the cake does not weigh you down or leave a feeling of "ugh" after from too much chocolate or sugar. One of my friends was shocked to learn she was eating a flour-less cake - she honestly could not fell from the texture and taste that there was no flour in the cake.
Despite the coffee flavor, which was very intense, I enjoyed this cake. I wish I'd brought home a small piece for myself to enjoy today (instead of sending it home with my chocolate-coffee loving friend as a belated birthday treat.) I would likely enjoy this alot more without such a strong coffee flavor, made with the coffee but not the coffee chocolate.
And after how well it was received last night, I can see that this cake will be requested again!
Now, I wonder what we are going to make next month? Baking with these ladies has been so much fun, and so inspiring, that I can't wait to read the rest of their entries and see what everyone thinks we should make next month.
Chocolate Intensity
from Tish Boyle's The Cake Book
(makes one 9-inch cake)

8 ounces bittersweet chocolate (preferably 62% cocoa), finely chopped
12 ounces (3 sticks) unsalted butter, cut into pieces
1 cup granulated sugar
1/2 cup brewed coffee
6 large eggs
1 tsp vanilla extract
1/8 tsp salt
Preheat oven to 350F. Butter the bottom and sides of a 9-inch round cake pan. Line the bottom with a parchment round and butter the parchment. (If you're using a pan with a removable bottom like a springform, make sure to wrap the pan with 2 or 3 layers of foil.)
Place chopped chocolate in a large bowl.
In a saucepan over medium-high heat, stir butter, sugar and coffee until the butter is melted and mixture is boiling. Pour the hot mixture over your chopped chocolate. Let stand for 1 minute then gently stir until chocolate is melted and the mixture is smooth.
In a medium bowl, whisk the eggs vigorously until blended. Whisk in the vanilla and salt. Slowly add about 3/4 cup hot chocolate mixture to the eggs, whisking constantly. (Tempering the eggs with a little bit of the hot chocolate mixture will prevent "scrambled eggs" when combining the two mixtures.) Add the egg mixture to the hot chocolate mixture and whisk to combine well.
Strain the batter through a sieve (to catch any cooked egg bits) and then pour batter into prepared pan. Set cake pan in a large roasting pan and fill the pan with enough hot water to come halfway up the sides of the cake pan. Bake for 35-45 minutes, until the center is shiny and set but still a bit jiggly. Transfer cake pan to a cooling rack and cool for 20 minutes.
Run a thin knife around the edge of the pan to loosen the cake. Place a cardboard round on top of the pan and invert the cake onto it. Remove pan and carefully remove the parchment paper. Refrigerate the cake for at least 2 hours before glazing with chocolate glaze.
Chocolate Glaze

6 ounces bittersweet chocolate, finely chopped
2/3 cup heavy whipping cream
1 tsp vanilla extract
Place chopped chocolate in a medium bowl.
In a small saucepan, bring the cream to a boil. Remove pan from heat and add the chopped chocolate. Let stand for 1 minute then gently stir until chocolate is melted and the glaze is smooth. Gently stir in the vanilla. Transfer glaze to a small bowl and cover the surface of the glaze with plastic wrap and let cool for 5 minutes at room temperature before using.
To glaze the cake:
Place the chilled cake, still on the cake round, on a wire rack set over a baking sheet. Slowly pour the hot glaze onto the center of the cake. Smooth the glaze over the top and sides, letting the excess drip onto the baking sheet.
Scrape the extra glaze from the baking sheet and put it in a small ziploc bag. Seal the bag and cut a tiny hole in one of the bottom corners. Gently squeeze the bag over the top of the cake to drizzle the glaze in a decorative pattern. Refrigerate the cake at least one hour before serving.
I've given up the fight
Dorie, you have won me over and I bow in homage to you!
While my Sunday's attempt at seduction did not yield the miracle results of my lounging, doing nothing, the day was not a total waste of housework and errands. I did have the time and opportunity to bake a cake.
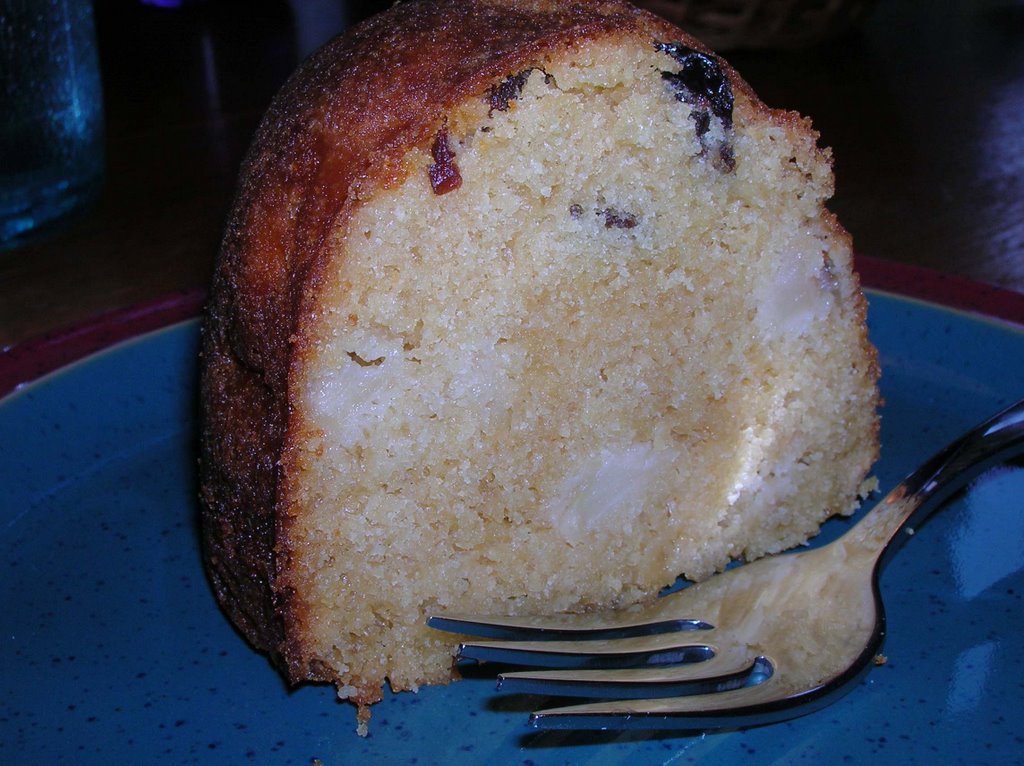
A brown sugar bundt cake, another recipe from Dorie's Baking: From My Home to Yours.
Initially this was intended as the treat of the week for lunch boxes. A sweet cake with chunks of fruit, in this cake apples and raisins replacing the initial pears and prunes (I had the pears, but not ripe, and the family won't eat the prunes.)
My plan failed however, when by Tuesday morning, it was gone.
I think that means they liked it!
This cake was good the day off, but Dorie was again right - it was even better the next day! A sweet crumb, not dense or delicate, with the flavors of the brown sugar and butter.
I've totally given up any pretense of reading this book but instead will now be picking and choosing from various recipes as needed.
Hmmm I wonder if my next book(s) will be as good?
SHF #28: Sweet Seduction
In a sense you could say I am easily seduced by sweets - or at least the prospect of sweets.
This entry into this month's SHF Sweet Seductions, hosted by Jasmine at Confessions of a Cardamom Addict is a prime example. It's not so much what I made as the fact that I am posting something in this blogging event when I had no plans to!
See? I was seduced into something sweet!
However this post is not about using something sweet to seduce my sweet (who I think is more easily seduced by spicy than sweet.) Instead I am choosing to tell you about the sweet I used to sweeten my family - filled with love and care.
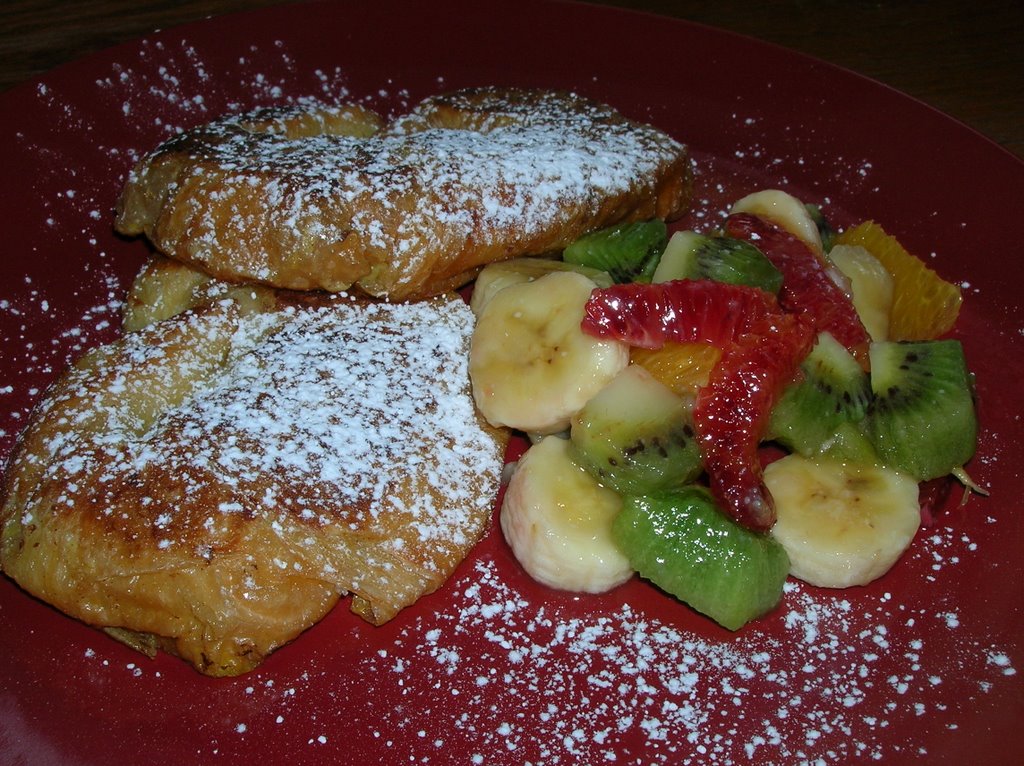
Such plans I had - lull them into submission with a decant breakfast, croissant French toast with fruit salad, and have them do my every whim for the rest of the day! While I lounged in the lap of luxury (doing nothing while still in my pj's), my family would be so grateful and full of desire to please me that they would scour my home from top to bottom, prepare weeks worth of meals for the freezer, run errands of every imaginable kind! And while I'm dreaming - rid my world of that cold, icy horrid stuff outside, not everywhere, but anywhere that I might have to be and go! And for even more fantasy - add a third bathroom in my house (no idea where it would go), one fitted with an empress sized bathtub with jacuzzi, bright windows, and self cleaning!
Alas, my seduction, sweet though breakfast was, as fresh as the fruit salad was (banana, kiwi, navel and blood orange), had little success. None of this happened. Instead I went about my normal errands, grocery shopping with a 4 year old, baked a cake, roasted a chicken, did things I would normally do on a Sunday. No new bathroom. The snow is still everywhere I look outside. And I need to dust.
Oh well, at least we had a good family breakfast! Croissant French Toast
6 croissants, split in half lengthwise
4 large eggs
1/2 cup milk
1 tablespoon brown sugar
zest of an orange (use the orange for your fruit salad)
1 teaspoon cinnamon
butter for pan
Mix all the ingredients except the butter together. Heat a large, non-stick pan over medium heat and melt some butter into the pan. Dip croissant half into egg mixture and place cut side down in frying pan. Repeat until pan is full but not crowded (I did mine in 3's.) When bottom is golden and browned, about 3-4 minutes, turn over and cook other side for about 2-3 minutes, again until golden and browned. Repeat until all the croissants are cooked.
Serve with warm syrup, a sprinkling of icing sugar, and fruit salad on the side.
Proof that I still remember how to cook instead of bake!
Let me start by saying that while I am not a fussy eater, there are some things I will not eat.
I'm willing to try most things at least once, and am probably the most adventurous eater of all of my circle of family and friends.
That said, I have an extreme dislike of peanut butter, both in taste and smell. Makes me an oddball right there - I was usually the only person in an entire school who wouldn't touch peanut better. (Though I like peanuts.)
I dislike squash, though as an adult I have learned I like spaghetti squash. I also learned I liked sweet potatoes. I can't stand melons, though again, there is an exception: on a hot, hot summer day, if the watermelon is good, I like watermelon.
And I can't stand cucumbers. I will pick them out of my sushi, my Vietnamese wraps, my salads, Greek or garden, I don't care.
Yet I love tzatziki. Yes, I know it is shredded cucumber. But there is so much garlic and yogurt that the cucumber is merely coloring!
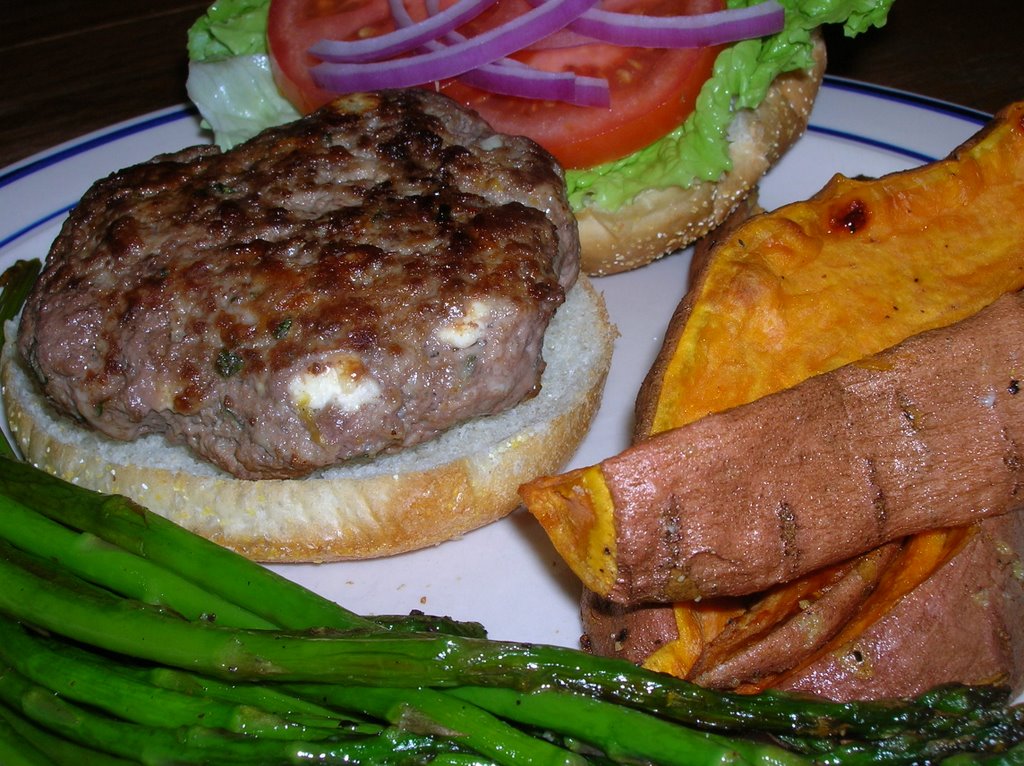
With that in mind, I decided to experiment on Friday night with a new type of burger - Greek burgers.
I mixed roughly equal amounts of ground lamb and lean ground beef into a bowl with lemon zest, lots of chopped garlic, and fresh, chopped oregano. Into that mixture I gently folded in small chunks of feta (another odd food thing of mine - I like real chunked feta but won't eat the crumbled stuff that passes for feta in restaurants. Oh, and I don't like olives.)
The burger patties were cooked in a fry pan over medium-high heat, turning a few times but being careful not to push down on them. While they cooked, I oven baked some sweet potato fries (as well as some wedged baked potatoes for the rest of the family who won't eat sweet potatoes), and oven roasted some asparagus, both tossed in olive oil, salt and pepper.
The burgers, when cooked through, were served on a bun that had been slathered in tzatziki and dressed with lettuce, ripe tomato and red onion slices. Hmmmm.
It was so good I had one for lunch the next day! (Oh and I froze a couple of extra patties for future lunch use.)
This meal was entirely about me - I knew my husband wouldn't be interested in it, so he got what I called bbq burgers, ground beef with salt, pepper and bbq sauce, while the kids half ate their Greek burgers. It didn't bother me in the least that no one else shared my happiness over these burgers - it meant there was more for me!
Believe it or not, sometimes you can have too much cake
We had an entire weekend of birthday.
First, on Saturday, we had a gaggle of kids in the house to see a magician, and enjoy cupcakes and loot bags.
Sunday was the "family" party, with more cake. And left over cupcakes.
The actual birthday was on Monday the 12th. And by then we had had enough of cake, whether a big one or in cupcake form.
I'm a mother, however, so there is no way I could let the day go without some sort of celebratory treat. Afterall, I once went through labor and a c-section to have this child. I needed a treat!
Sure, I could have gone very fancy and made a pie or a tart. Or just made individual cookies that could be made into ice cream sandwiches, the perfect dreary winter type dessert (that makes you long and appreciate summer even more.)
Yes, some people would appreciate the fancy. But we are talking about an 8 year old boy. He doesn't want fancy. He wants lots and yummy, in that order!
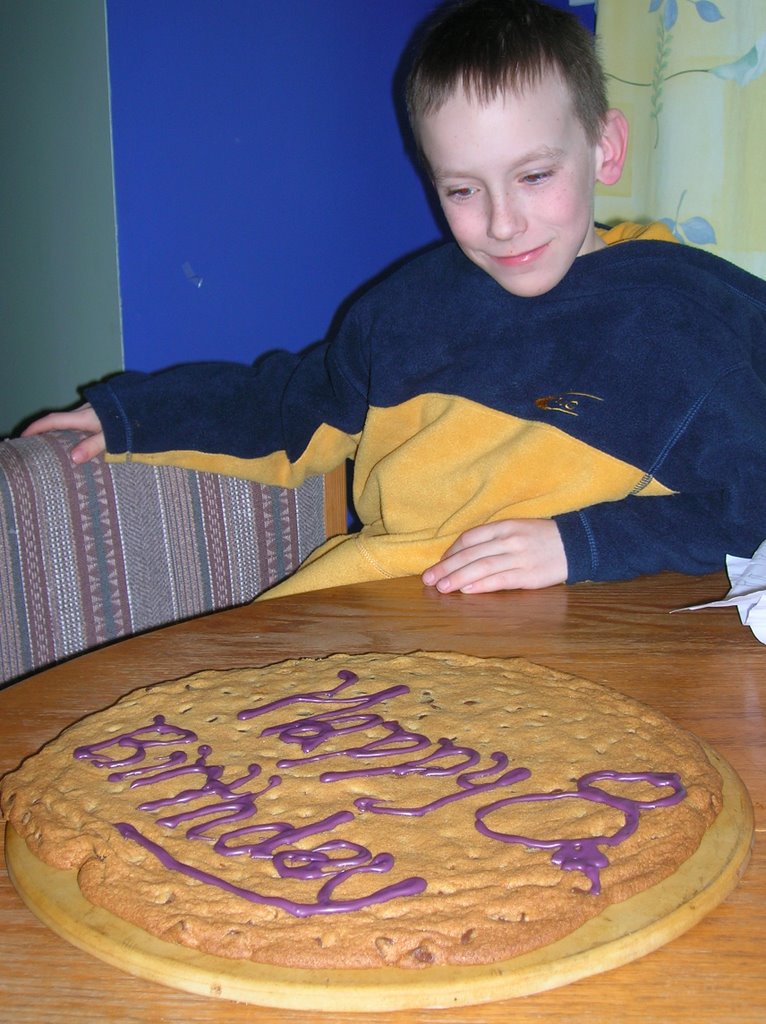
Instead I went both simple and grandeur at the same time. Cookies, yes, but not many little cookies. I went BIG! A giant cookie, large enough to be written on, and perfect for a low key celebration.
Rather than go to my standard chocolate chip cookie recipe, I instead went with the classic Toll House recipe, which I had actually never made before. And I stuck to the recipe, with no tweaking or changes (except the usual omitting of the nuts.)
I had a bit of a size issue - my cookie puffed and expanded a bit unevenly, so I ended up fishing out a few knocked off pieces off my oven floor, but all together baked up beautifully. Crispy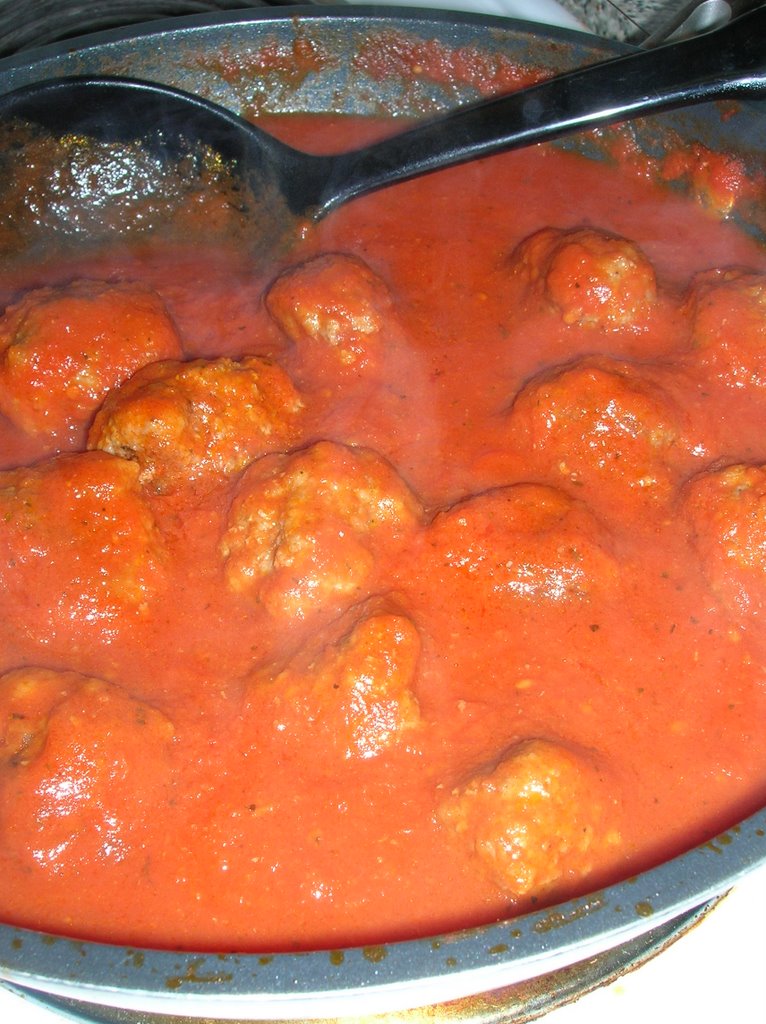 edges, soft interior, a good ratio of cookie to chips.
And completely successful in the eye-popping, WOW department for the birthday boy.
Then I added to his surprise by serving him some of his giant cookie with a big scoop of homemade chocolate ice cream.
Can you think of a better way to follow up on a spaghetti and meatball dinner than cookies and ice cream, both loaded with chocolate?
While chilling my ice cream, I was reminded of a recent post by Brilynn where she made ice cream and cooled down her mix by putting the pot into a snowbank. I admit, I was tempted. We had the cold, and the snow. What I didn't have was trust - I was leaving to bring the littlest one to school and didn't trust that my pot, or covered bowl, would stay untouched in a snowbank! (I guess I could have tried my closed in backyard, but didn't think of that until just now.)
Instead I chilled it in a sink full of ice water.
Despite the unadventurous chilling, my ice cream turned out smooth and chocolatey. I hadn't bothered measuring out the 5 ounces of chopped chocolate, reasoning that more wouldn't hurt it and that my scale is not very good (which it really isn't.)
Oh and I made a few more tweaks:
I only had 1 1/2 cups of heavy cream so subbed in light cream for the balance. I had 1% milk instead of whole milk, and I added an extra egg yolk to make up for the thinner milk/creams and to help with the custard.
So much for following a recipe through the first time!
Finally the birthday is done, all the presents are opened, and we can get back to normal. Now, what was a baking before all this cake stuff came around? :-)
My recipe, btw, came from the book that came with my ice cream machine, and here it is, the original recipe, not my tweaked version. If you'd prefer to try mine, just make the changes listed above.
Rich chocolate ice cream
5 ounces semi-sweet chocolate, chopped
2 cups heavy cream
2 cups whole milk
2 egg yolks
1/2 cup sugar
1 tablespoon pure vanilla extract
Combine milk, cream and chocolate in a medium sauce pan over medium heat and cook until mixture almost boils and chocolate is melted, about 5-8 minutes. Reduce heat to low.
Meanwhile, beat yolks, sugar and vanilla in a small bowl until light yellow and smooth. Add 4 tablespoons of warm cream mixture and stir until combined.
Gradually add egg yolk mixture to warm cream, stirring continuously to prevent the eggs from curdling. Cook over low heat until slightly thickened and mixture coats the back of a spoon, about 3-4 minutes. Cool completely. Stir gently and pour into freezer bowl. Follow machines instructions for mixing and chilling ice cream.
Call me a rebel
 No sooner had I said I would finish the book, I turned around and made another recipe from it.
Right now no one is asking, "What book." You just know.
The BOOK.
Very quickly becoming a bible for bakers and bloggers.
And right now you'd have to pry it from my dead fingers to take it from me.
Yes, it is that good.
I had plans to make a sheet cake on Sunday morning. A vanilla sheet cake with chocolate icing, both recipes from The Barefoot Contessa. Then I ran into a snag - where do you get a sheet pan that is 12 x 18 x 1 1/2? The 12 x 18 part is easy. It is the extra 1/2 inch I couldn't find, though Ina says she gets here sheet pans at William-Sonoma, Crate & Barrel and Sur La Table. All stores I don't have in Ottawa. (Note - I found one, at a local craft store - 12 x 18 x 2!)
I must have been dreaming of recipes and websites and cookbooks all Saturday night, trying to figure out what I would make for Sunday's party, the family celebration of my son's 8th birthday. It was a restless night, tossing and turning, my mind churning.
Until I gave in.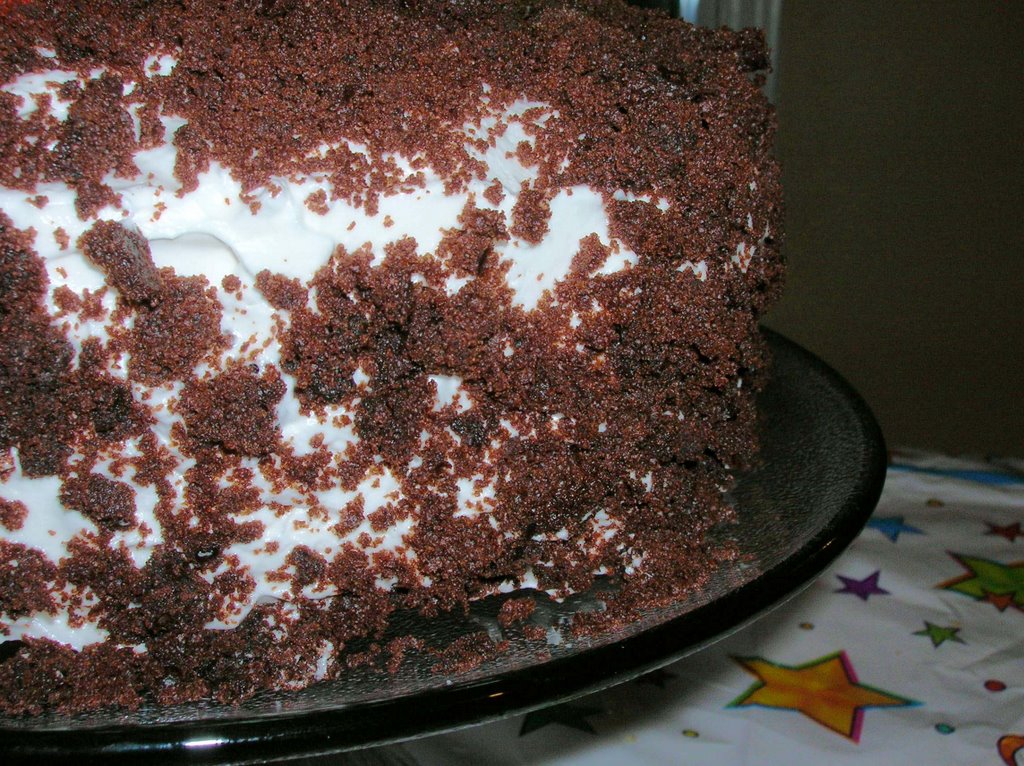 When I woke up I turned on my laptop, did a few quick searches, nothing serious, then pulled out Dorie and picked a cake.
Not just any cake - the cake. The cover cake, The Devil's Food White-out cake.
I'd never made a marshmallow frosting before - or cut two layers into four. My normal nerves at trying something new, especially when I had 20 some people expected to come that evening, left me and I dove right in, confident that I would not have problems with this cake. The recipe would be clearly written and easy to follow, I was sure.
Two days later, I can't tell you if it was easy to follow or not, most of the baking process is now a blur, but either way, I did not manage to screw it up. Though I didn't notice until afterwards that the front cover cake does not have the crumbs on the top whereas the picture inside the book (page 246 if you have it), does.
And only now, two days later, am I reading the part that says to use a serrated knife and a sawing motion to cut. No wonder they had such beautiful, un-crummy slices!
This cake satisfied children and grown ups alike. My children were swooning, yes, swooning, over the marshmallow frosting. The birthday boy had the honor of licking the whisk attachment clean from the mixer, but both were able to sample the frosting before it went on the cake.
And there is ample frosting to go with the cake. I actually should have put a more generous amount between the layers, but erred on the side of caution. Next time I'll know better.
Mark my words... there WILL be a next time.
So if you are looking for a showstopper type of cake that is both delicious and not overly sweet (despite the mountain of marshmallow involved), it is on page 247.
Oh, and for those who wonder - no this cake does not serve 20+ people. We had a few cancellations but also had left over cupcakes from the previous day's children's birthday party.
Is it wrong to lick the crumbs off your plate?
 Trust me - this picture is awful (and unfortunately was the best of the bunch) but the brownies themselves are simply decadent.
Chocolaty, fudgy brownies on the bottom, topped by chocolate chip cookie, recipe courtesy of Dorie Greenspan.
Most of the blogs that I follow, drool and envy, have all been cooking with Dorie Greenspan's Baking From my home to yours. The pictures and descriptions talked about from this massive tome were wonderful. Beautiful pictures, mouth watering baked goods, and rave reviews. How could I resist running out to get myself a copy of the book?
(Actually I did resist, so close to Christmas - then I was given a gift certificate at a book store and ran, ran, ran!)
Now 'regular' readers know that I have a self imposed rule about my cookbooks - read them first, then go back and make stuff from them. Occasionally I am so tempted by something I break that rule.
When I started reading Dorie, I had a hard time not heading to the kitchen as soon as I started reading the book. I actually wondered if it was a bad idea to start at the beginning of the book and just bake and read in tandem. Really. Would that be a bad idea? (Other than for the waist lines of those of us who live here.)
On to the recipe. It isn't complicated. It's brownies and chocolate chip cookies, baked together.
Chipster-topped brownies
For the brownie layer
6 ounces bittersweet chocolate, coarsely chopped
3 ounces unsweetened chocolate, coarsely chopped
2 sticks unsalted butter, cut into chunks
1 2/3 cups sugar
4 large eggs
1/2 teaspoon salt
1/2 teaspoon vanilla extract
1 cup all purpose flour
1 cup walnuts, coarsely chopped (I left these out)
For the cookie layer
1 1/4 cup all purpose flour
1/2 teaspoon baking soda
1/2 teaspoon salt
1 1/2 sticks unsalted butter, at room temperature
3/4 cup packed light brown sugar
2/3 cup sugar
1 large egg
1 large egg yolk
1 teaspoon vanilla extract
6 ounces bittersweet chocolate, chopped into chips, or 1 cup store bought chocolate chips
Preheat oven to 35o degrees F. Butter a 9x13 baking pan, line it with wax or parchment paper and butter the paper. Put the pan on a baking sheet.
To make the brownie batter, put both chocolates and the butter in a bowl set over a saucepan of simmering water. Stirring occasionally, heat just until the ingredients are melted, shiny and smooth. Remove the bowl from the heat.
Working with a stand mixer fitted with a paddle attachment, beat the sugar and eggs on medium high speed for about 2 minutes, until pale, thick and creamy. Beat in the salt and vanilla extract. Reduce the speed to low and mix in the melted chocolate and butter, mixing only until incorporated. Scrape down the sides of the bowl with a rubber spatula, then, still on low speed, add the flour, mixing only until it disappears into the batter. If using the walnuts, use the spatula to fold in the walnuts before scraping the batter into the prepared pan. Set aside.
To make the cookie dough, whisk together the flour, baking soda and salt. Working with the stand mixer in the cleaned bowl, beat the butter and both sugars together on medium high speed until smooth and creamy, about 3 minutes. One at a time, add the egg and the yolk, beating for 1 minute after each addition. Beat int he vanilla. Reduce the mixer speed to low and add the dry ingredients, mixing only until they disappear into the dough. Still on low, mix in the chopped chocolate. Drop the cookie dough by spoonfuls over the brownie batter and, using a spatula and a light touch, spread it evenly over the batter.
Bake for 50-55 minutes, or until the cookie top is deep golden brown and firm and a thin knife inserted into the brownie layer comes out with only faint streaks of moist chocolate. Transfer the pan to a rack and cool to room temperature.
When the brownies are completely cool, carefully run a knife between the sides of the pan ad the brownies, then invert them onto another rack, remove the paper and turn right side up onto a cutting board. Cut into bars about 2 inches by 1 inch.
I actually came pretty close to following this exactly. I was short 1 ounce of unsweetened chocolate, and was using all 6 ounces of bittersweet that I had, so used 1 ounce of semi-sweet chocolate and reduced the sugar by a bit. Didn't measure, so not sure exactly how much.
I omitted the nuts, but then I always do.
And 1x2 inch squares were so small that after the first one, I cut larger. Even larger I still had brownies for lunches, desserts and whatever snacks all week.
Now to get back to reading the rest of the book. After all, I only had the willpower to make it to page 94 of the book before I had to go bake from it. There are almost 500 pages of recipes in this book though, so I doubt I will make it to the end before I bake from it again.
Oh well! Breaking rules should always taste this good.
The 3 day Linzer cookies that weren't
Actually, these cookies started sometime after Christmas, one day when I was at the mall with my teenaged brother. He wanted music and I was just there with him.
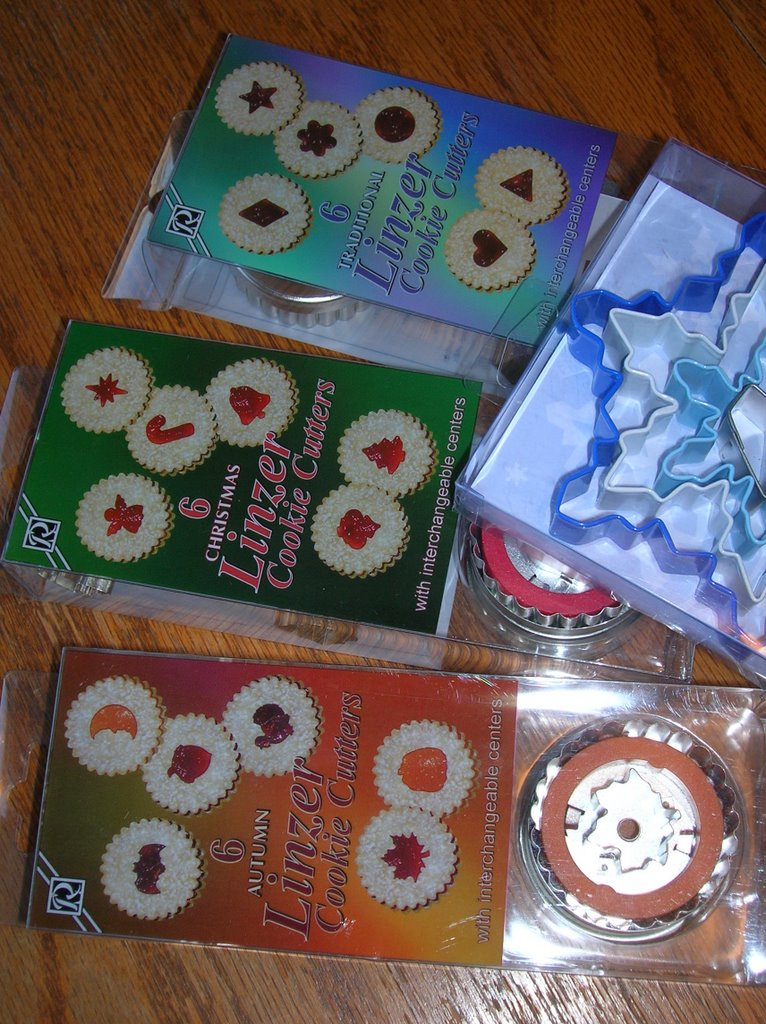
When we left that mall, he had a heavy metal cd that made me shudder, and I had 4 new sets of cookies cutters, purchased at a 50% off clearance sale. Three sets of Linzer cookie cutters and a snowflake set.
I admit, I had no intentions of making Linzer cookies. They seemed fussy, with the two layers, and jam is not something I want in my cookies.
I admit, again, I bought 3 sets of Linzer cookie cutters for the cut out centers. Yes, the cute little center cut outs. I ended up with the traditional centers: diamond, heart, circle, star, flower and triangle. I bought early for next year, a Christmas set of angel, candycane, Christmas star, bell, ornament and tree. And the more fun Autumn set of pumpkin, acorn, turkey, maple leaf, moon (with little face) and bat.
All so I could make little itty bitty cookies and crackers in fun shapes for my children. (Or me.)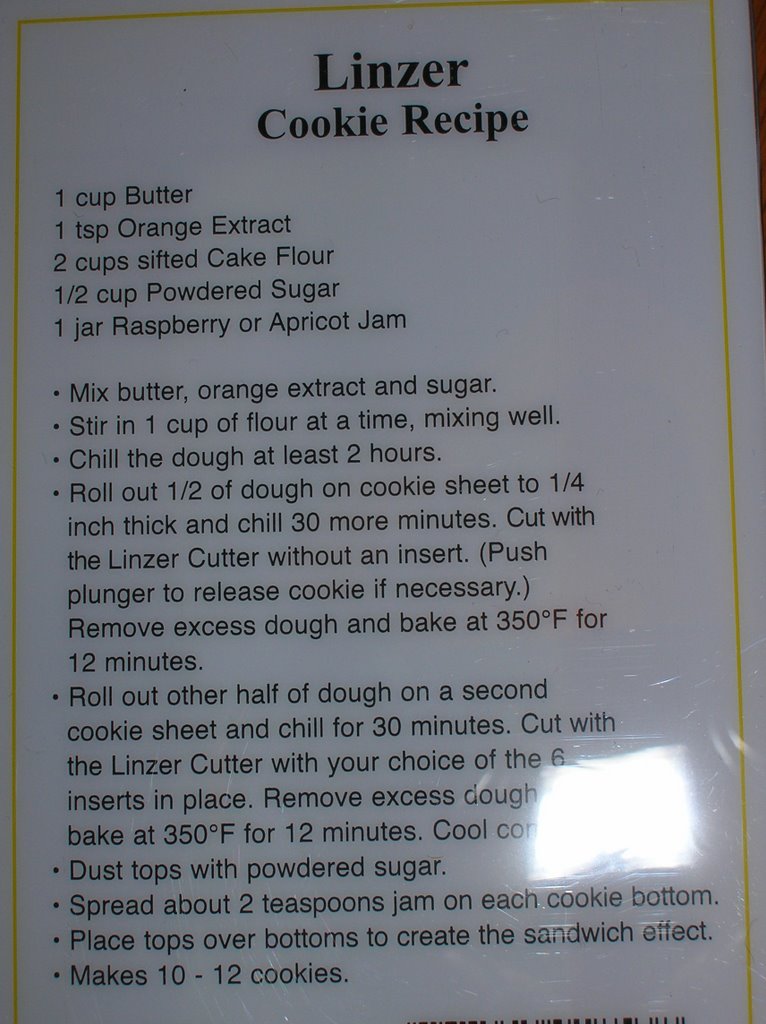 For one reason or another, not sure what it is, I suddenly had the desire to make Linzer cookies. A brand new jar of raspberry jam was waiting for me, and the recipe on the back of the cookie cutter boxes did not involve any kind of nut. So I threw together the dough and put it in the fridge for the minimum of 2 hours of chilling.
Then I forgot about it.
I forgot about it that day.
I forgot again the next day. (Which was very busy.)
Three days later, I pulled out my dough to allow it to warm up slightly before I started rolling and cutting. I set up my counter, having cleaned and dried it off, sprinkled some flour on it, turned on my oven and gotten out my rolling pin and my cutter of choice.
An hour later the dough was still cold and very, very hard.
It was also crystalized on the surface. Actually, it seemed crystalized everywhere.
Two hours later and not much had changed. The dough wasn't cold anymore, but it was still hard and very crumbly. Not exactly a good candidate for rolled cookies.
So I threw it out.
And then went looking for a sugar cookie recipe (my previous search for a Linzer cookie recipe revealed only 2 with no nuts in it - the one I made and one from Cooking Light, though it required things I didn't have on hand. Like egg substitute.) As usual, I ended up here.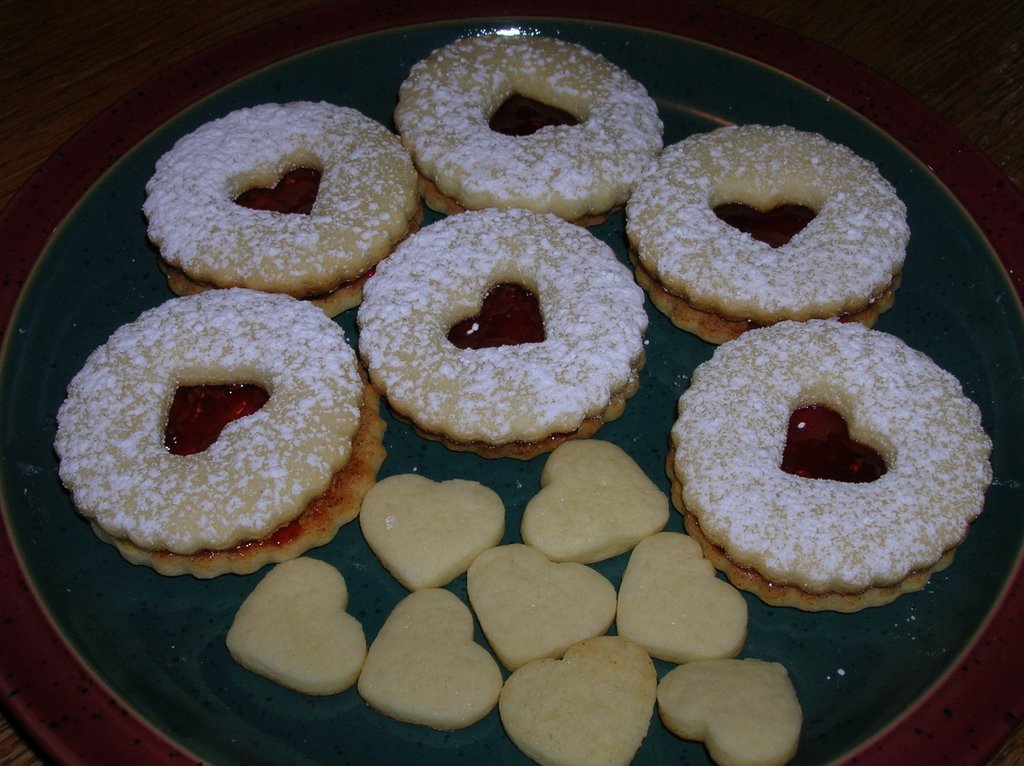 This dough made good cookies. Easy to roll, did not get tough when I rerolled (and rerolled) the scraps. Baked up golden brown on the bottom, perfectly colored on the top. And melded very well with the raspberry jam and icing sugar.
And the little heart cutouts were so cute!
I have had excellent feedback on these, from both the usual, and some unusual sources.
Another admission - a week later and I still have half the cookie dough in my fridge. I suspect it will be fine and will roll and bake just fine.
Which is good - I have company coming soon and a few Linzer cookies, heart ones of course, would be a perfect thing to serve them with their tea!
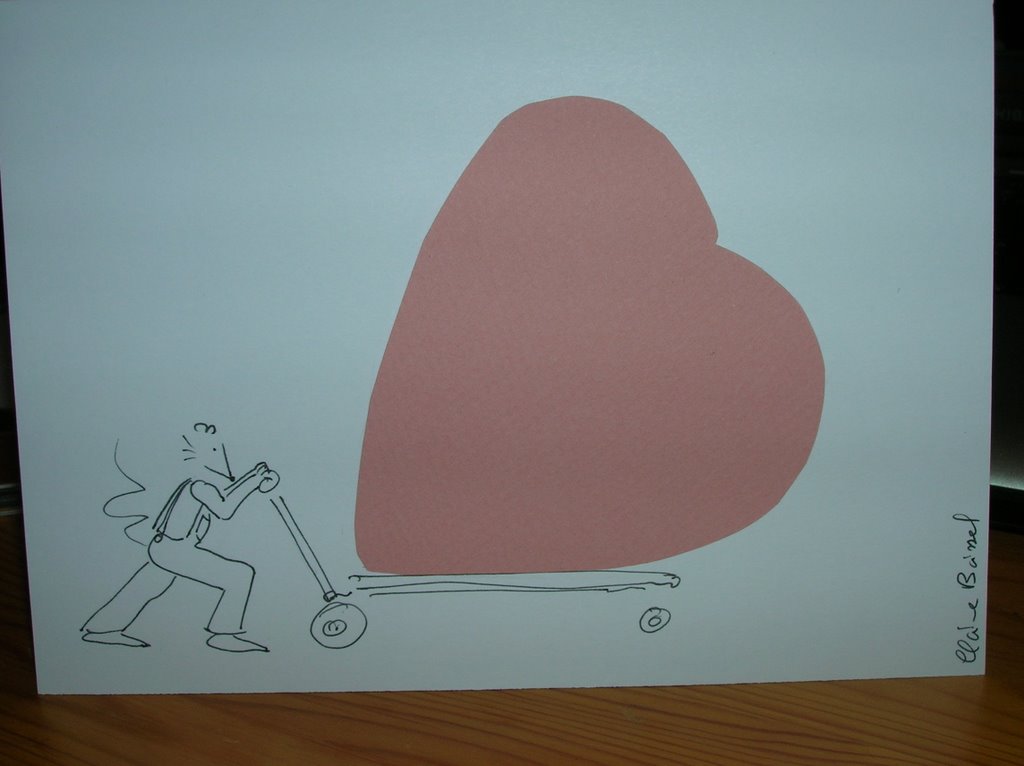
Beautiful Valentine's Art
 I guess I should have checked Friday's mail before today!
Then I would have known before this afternoon (Sunday) that I had received my postcard from the Valentine's BPW that I mentioned a few blogs entries back, here.
Only I didn't get a postcard.
Instead I received a beautifully hand drawn card all the way from France, sent to me by Plume of Multiple. In it, Plume tells me that she is an artist, both in music and in drawing, and that she had drawn this picture just for me!
Plume's blog, however, is pretty well entirely in French, and my French reading skills are even worse than my speaking! I guess this is an extra incentive to practice them.
(I think I need to go find a frame for my postcard now, so that when Plume is a famous artist with published books or her work, I will have mine, nice and safe.)
Thanks to both Meeta and Plume!


